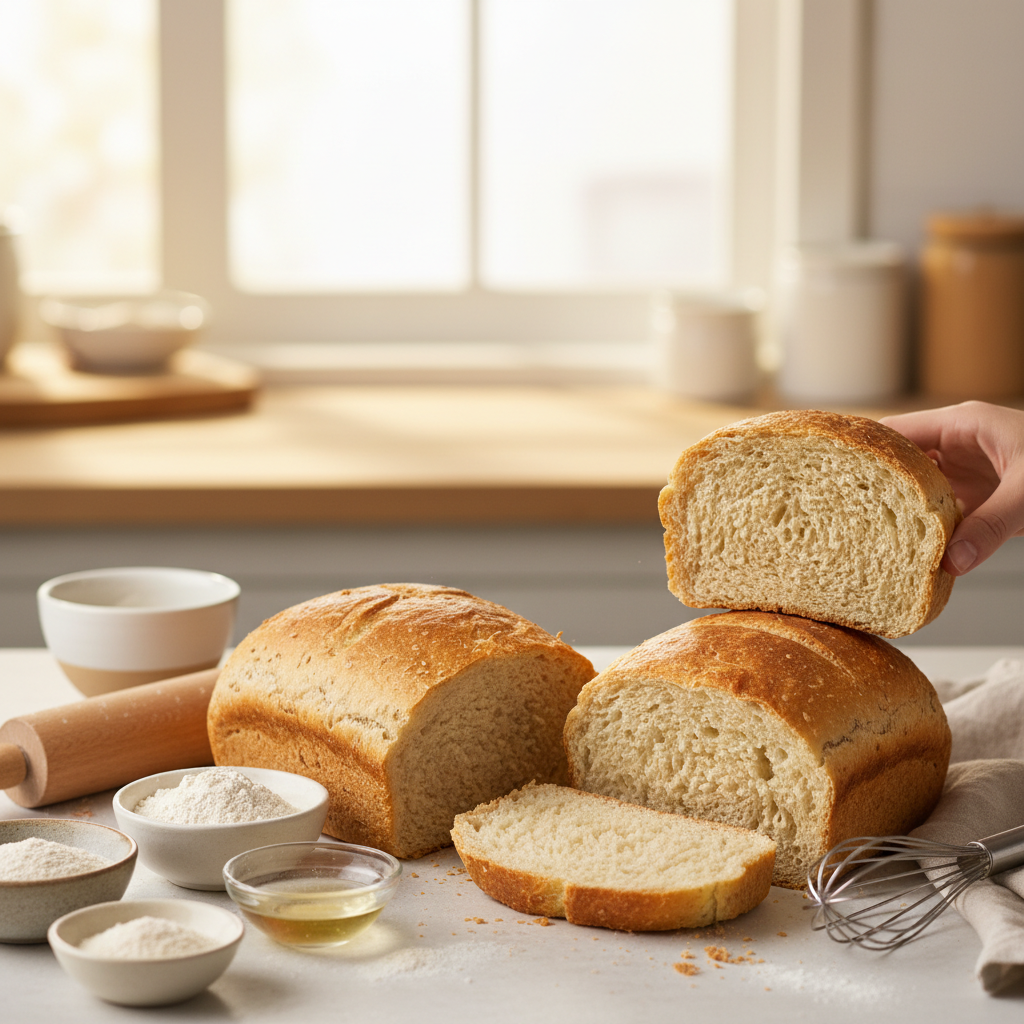
If you've been burned by gluten-free sandwich bread that crumbles when you look at it wrong, you're not alone. We've tested dozens of approaches and narrowed it down to five recipe styles that consistently produce soft, sliceable loaves you can actually build a sandwich on.
Key takeaways
- The best gluten-free sandwich bread uses a combination of starches and whole-grain flours — not just one flour on its own.
- Psyllium husk is the most reliable binder for sandwich bread because it creates a flexible, stretchy crumb that mimics gluten's structure.
- Gluten-free bread dough should be wet and batter-like, not stiff — if you can shape it by hand like wheat dough, it's too dry.
- Internal temperature of 205-210°F is the most reliable way to know your bread is fully baked without being gummy.
- A Pullman loaf pan produces the most sandwich-friendly shape with even, square slices.
- Proper cooling (at least 1-2 hours on a rack) is non-negotiable — cutting too early guarantees a gummy center.
Why gluten-free sandwich bread is harder than other bread types
Sandwich bread is arguably the most demanding style of gluten-free bread because it needs to do three things at once: hold together when sliced thin, stay soft enough to bite through easily, and not fall apart under the weight and moisture of fillings. Most gluten-free bread recipes are optimized for one or two of these qualities, but not all three.
The core challenge is replicating gluten's elastic network. In wheat bread, gluten traps gas bubbles and creates a springy, cohesive crumb. Without it, you need the right combination of binders, starches, and hydration to build a similar structure. Get the balance wrong and you end up with bread that's dense, crumbly, or gummy — sometimes all three in the same loaf.
The good news is that once you understand which ingredients do what, you can pick a recipe style that matches your pantry, dietary needs, and skill level. Let's walk through the five approaches that actually work.
Approach 1: Rice flour and tapioca starch blend with psyllium husk
This is the gold standard for soft, sliceable gluten-free sandwich bread, and it's where we recommend most people start. The combination of brown rice flour for structure, tapioca starch for chewiness, and psyllium husk as the binder produces a crumb that's remarkably close to conventional wheat sandwich bread.
Why this approach works
Psyllium husk absorbs roughly 10 times its weight in water and forms a gel that acts like a gluten substitute — trapping gas, holding moisture, and creating the stretch you need for a cohesive slice. Tapioca starch contributes chewiness and helps the crumb spring back instead of crumbling. Brown rice flour provides a neutral flavor base and enough protein to give the bread body.
A typical ratio is about 60% rice flour, 30% tapioca starch, and 10% potato starch by weight, with 2-3 tablespoons of psyllium husk powder per loaf. The dough should look like thick cake batter — not something you can shape with your hands.
Common mistakes with this style
The biggest mistake is using too little water. This dough needs to be very wet. If it looks like traditional bread dough, add more liquid. The second most common issue is using psyllium husk flakes instead of finely ground powder, which creates a grainy texture and doesn't bind as well. Finally, many bakers underproof this bread. Give it a full rise — usually 45-60 minutes — until the dough reaches about 1 inch above the rim of your pan. If your loaf isn't rising well, our guide on how to make gluten-free bread rise properly covers every variable.
If you're looking to build a well-stocked pantry for this kind of baking, our Confident Gluten-Free Baker Toolkit walks you through exactly which ingredients and tools to invest in so you're not guessing.
Approach 2: Commercial flour blend loaf (the fastest path to good bread)
If you want soft sandwich bread without weighing five different flours, a high-quality commercial blend is the most reliable shortcut. The best blends have already balanced the starch-to-flour ratios and often include a binder, so you just add wet ingredients and go.
What to look for in a blend
Not all blends are created equal. For sandwich bread specifically, you want a blend that contains both a starch (tapioca or potato) and a protein-rich flour (rice, sorghum, or millet). Blends that are mostly starch produce bread that stales fast and has a gummy interior. We've compared the top options in our gluten-free flour blend brand comparison — it's worth reading before you commit to a bag.
King Arthur Measure for Measure and Bob's Red Mill 1-to-1 are two of the most popular choices. Both contain xanthan gum already, so you won't need to add extra binder. If your blend doesn't include xanthan gum, add about 1 teaspoon per cup of flour.
How to get the best results from a blend
Even with a good blend, technique matters. Use a kitchen scale instead of measuring cups — gluten-free flours pack differently and a 20% measurement error is common with cups. Let the mixed dough rest for 10-15 minutes before panning so the starches can hydrate. And don't skip the eggs — they provide critical structure and moisture in blend-based recipes.
Common mistakes with blend-based bread
The most common issue is treating blend-based bread dough like wheat dough. You shouldn't knead it, and it should be much wetter than you expect. Overmixing can actually break down the starch structure. Mix until just combined, scrape into your pan, smooth the top with a wet spatula, and let it rise. If your bread is coming out dense, it's almost always an issue with hydration or proofing time.
Approach 3: Oat flour-based sandwich bread
Oat flour produces some of the softest, most tender gluten-free bread you'll ever eat. It has a mild, slightly sweet flavor that works beautifully for sandwiches, and its higher protein and fat content compared to rice flour means the bread stays moist longer.
Why oat flour makes such soft bread
Oat flour contains beta-glucan, a soluble fiber that acts as a natural emulsifier and moisture-retainer. This means oat bread stays soft for 2-3 days at room temperature — much longer than most rice-based loaves. The protein content (around 13-17%) also helps create a more cohesive crumb without relying as heavily on binders.
A good starting point is 70% certified gluten-free oat flour and 30% tapioca starch, with either psyllium husk or xanthan gum as a binder. Psyllium gives a chewier, more bread-like result; xanthan produces a softer, more cake-like crumb.
Important considerations for oat flour bread
You must use certified gluten-free oats. Conventional oats are frequently cross-contaminated with wheat during growing and processing. Beyond the safety issue, oat flour absorbs liquid differently than rice flour, so don't try to swap it into a rice-based recipe 1:1 — you'll need to increase the liquid by about 15-20%.
Common mistakes with oat bread
Overbaking is the number one killer of oat flour bread. Because oat bread browns faster than rice-based bread, bakers often pull it out too early (it looks done but isn't) or leave it in too long (the crust gets tough). Use an instant-read thermometer and pull the bread at 205-210°F internal temperature. Tent with foil after the first 20 minutes if the top is browning too fast.
Approach 4: Bread machine sandwich bread
A bread machine takes the guesswork out of mixing, proofing, and baking — and for sandwich bread specifically, the consistent environment produces reliably even results. If you bake sandwich bread weekly, a machine pays for itself in time savings alone.
Which machines work for gluten-free bread
Not every bread machine has a gluten-free cycle, and using a standard cycle will overwork the dough and produce a dense, tough loaf. We've tested the top options in our bread machine comparison. The short version: the Zojirushi BB-HAC10 is the best overall, and the Hamilton Beach 29882 is the best budget option. Our head-to-head comparison breaks down exactly what you get at each price point.
Tips for the best bread machine sandwich loaves
Even with a gluten-free cycle, a few tweaks make a big difference. Add ingredients in the order your machine specifies (usually wet first, then dry, with yeast on top). Use room temperature eggs and liquids — cold ingredients slow the yeast and result in a denser loaf. And don't open the lid during the rise cycle, no matter how tempted you are. The temperature drop can cause the bread to collapse.
Common mistakes with bread machines
The most common mistake is using a recipe designed for hand mixing. Bread machine recipes need slightly different hydration levels because the machine's mixing paddle incorporates air differently. If your machine bread is collapsing, it's usually because the dough was too wet for the machine's cycle timing, or you used too much yeast and it overproofed. Start with the recipe that came with your machine and adjust from there.
Approach 5: High-protein sandwich bread with sorghum and millet
If you want sandwich bread with more nutritional substance and a heartier flavor, a sorghum and millet base delivers. These ancient grains have higher protein than rice flour and produce bread with a more complex, wheaty flavor that's especially good for savory sandwiches.
Why sorghum and millet work well together
Sorghum flour has a mild, slightly sweet flavor and a protein content around 10-11%. Millet flour adds a light, buttery quality and helps with browning. Together, they create a flavor profile that's closer to whole wheat bread than any rice-based recipe. Adding potato starch (about 20-25% of the total flour weight) keeps the crumb tender and prevents the bread from being too heavy.
Getting the texture right
The key to soft, sliceable sorghum-millet bread is generous hydration and a strong binder. Psyllium husk works best here — use about 2 tablespoons per loaf. You'll also want to add a fat source like olive oil or melted butter (2-3 tablespoons) to keep the crumb tender. Without enough fat, high-protein GF bread can be dry and crumbly.
Common mistakes with high-protein GF bread
Sorghum and millet flours can have a slightly bitter or beany aftertaste if they're not fresh. Buy from a supplier with good turnover and store your flours in the freezer. If your bread has a strange aftertaste, stale flour is almost always the cause. The other common issue is density — these flours are heavier than rice flour, so you may need to increase your yeast by 25% and extend the proofing time.
Comparison of the five approaches
| Approach | Softness | Sliceability | Shelf life | Difficulty | Best for |
|---|---|---|---|---|---|
| Rice flour + tapioca + psyllium | Excellent | Excellent | 2 days | Intermediate | Classic white sandwich bread |
| Commercial flour blend | Good to excellent | Good | 2 days | Beginner | Quick, reliable results |
| Oat flour-based | Excellent | Good | 3 days | Intermediate | Longest-lasting softness |
| Bread machine | Good | Good | 2 days | Beginner | Hands-off weekly baking |
| Sorghum + millet | Good | Good to excellent | 2 days | Intermediate to advanced | Hearty, nutritious bread |
Essential techniques for any gluten-free sandwich bread
No matter which approach you choose, these techniques apply across the board and make the difference between bread that works and bread that disappoints.
Weigh your ingredients
We cannot stress this enough. A cup of rice flour can weigh anywhere from 120g to 180g depending on how you scoop it. That kind of variance will ruin any recipe. A good kitchen scale is the single most impactful tool upgrade you can make.
Use the right pan
A standard 9x5 loaf pan works, but a Pullman loaf pan with a lid produces perfectly square slices that look and feel like store-bought sandwich bread. The lid also creates a more even bake by trapping steam, which helps the crust stay soft.
Cool completely before slicing
This is the rule most people break, and it's the one that matters most. Gluten-free bread continues cooking and setting its structure as it cools. Cut into it early and you'll get a gummy, sticky interior that seems underbaked — even if the internal temp was perfect. Wait at least 1 hour, ideally 2, on a cooling rack with air circulating underneath.
Slice and freeze for the best results
Gluten-free sandwich bread stales faster than wheat bread because it lacks gluten's moisture-retaining network. The best strategy is to slice the entire loaf once cooled, separate slices with parchment paper, and freeze in a zip-top bag. Pull out slices as needed and toast directly from frozen — they'll taste just as good as day one.
Frequently asked questions
What is the best flour for soft gluten-free sandwich bread?
A blend of brown rice flour and tapioca starch produces the softest results for most bakers. The rice flour provides structure while tapioca starch adds chewiness and elasticity. Oat flour is another excellent option if you tolerate oats, as it naturally retains more moisture. Avoid using any single flour on its own — blends always outperform solo flours in sandwich bread.
Why is my gluten-free sandwich bread so crumbly?
Crumbly gluten-free bread is almost always caused by too little binder, too little moisture, or both. Make sure you're using enough psyllium husk or xanthan gum — for sandwich bread, psyllium husk powder (2-3 tablespoons per loaf) gives the best cohesion. Also check that your dough is wet enough — it should be batter-like, not dough-like. Our full guide on fixing crumbly gluten-free bread covers every possible cause.
Can you make gluten-free sandwich bread without xanthan gum?
Yes. Psyllium husk powder is the best xanthan gum alternative for sandwich bread and many bakers actually prefer it. Psyllium creates a more flexible, bread-like crumb compared to xanthan gum's slightly springy texture. Use about 2 tablespoons of finely ground psyllium husk powder per loaf. Flax meal mixed with water can also work as a binder, though it produces a denser loaf. Learn more about the differences in our binder comparison guide.
How do you keep gluten-free sandwich bread from going stale?
The best method is to slice the loaf after it has fully cooled, then freeze individual slices separated by parchment paper. Toast slices directly from frozen for the best texture. At room temperature, store bread in an airtight bag or container — never in the refrigerator, which accelerates staling. Oat flour-based recipes tend to stay soft longest, about 3 days at room temperature. For more on this issue, see our guide on preventing quick staling.
Do you need a bread machine to make gluten-free sandwich bread?
No, but a bread machine does make the process easier and more consistent, especially if you bake weekly. A stand mixer with a paddle attachment works just as well for mixing — gluten-free bread dough doesn't need kneading, just thorough mixing. If you're deciding whether a machine is worth it, our post on whether you need a bread machine for gluten-free bread breaks down the honest pros and cons.

Written by
Co-founder, BakingSubs
Co-founder of BakingSubs, where he turns the science of ingredient substitutions into tested, reliable guidance for home bakers.
Related Posts
How to Price Sourdough Bread for Sale: A Real Framework From Bakers Who Actually Profit
How Much Does Bakery Insurance Actually Cost? Real Numbers From 6 Policy Types

How to Manage Rush Orders as a Home Baker (Without Wrecking Your Week or Your Margins)
Bake with Confidence
See all
Confident Gluten-Free Baker Toolkit
The science-based system that replaces gluten's seven invisible jobs so your baking turns out soft, fluffy, and foolproof — every time.

Gluten-Free Recipe Vault
Instant access to our complete library of proven gluten-free recipes — no waiting, no guesswork, just results that work tonight.

Fix Your Gluten-Free Bread
Learn the 3-step formula to make bread rise and stay soft, discover why your loaves collapse, and get a tested sandwich bread recipe that actually works.