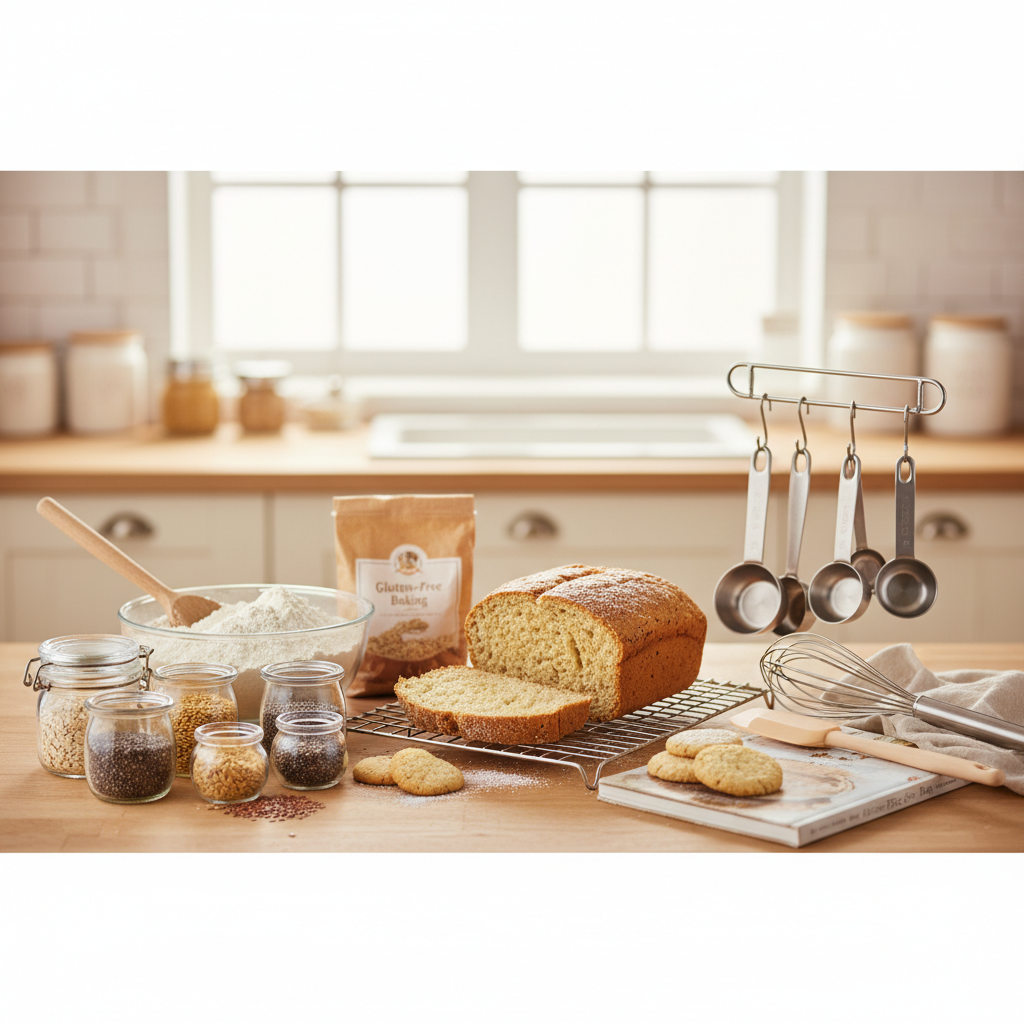
Setting up a gluten-free baking kitchen the right way saves you from failed recipes, cross-contamination scares, and wasted money on ingredients that get ruined before you use them. Here's everything you need to know to get your kitchen organized, safe, and ready to bake.
Key takeaways
- Cross-contamination is the biggest hidden threat in a shared kitchen — porous tools like wooden spoons, cutting boards, and silicone mats should be dedicated gluten-free or replaced entirely.
- You don't need a separate kitchen. A dedicated shelf, labeled containers, and a few key habits make a shared kitchen safe for gluten-free baking.
- A kitchen scale is the single most important tool for gluten-free baking because gluten-free flours vary dramatically in weight per cup.
- Stock 4-5 core flours and starches plus at least one binder to cover the vast majority of gluten-free recipes.
- Labeling everything — containers, tools, shelf space — prevents accidental gluten exposure and keeps household members on the same page.
- Invest in quality basics first, then add specialty tools as your baking expands.
Why a gluten-free kitchen setup matters more than you think
Even trace amounts of gluten — as little as 20 parts per million — can trigger symptoms for people with celiac disease. A single breadcrumb left on a countertop or a shared colander can be enough. That's why setting up your kitchen with intention isn't optional if you're baking for someone who needs strict gluten avoidance.
The good news? You don't need to gut your kitchen or spend thousands of dollars. A few strategic changes to how you organize, clean, and stock your space will make a massive difference. We've broken this guide into the sections that matter most: preventing cross-contamination, choosing dedicated tools, stocking your pantry, and organizing everything so baking day is actually enjoyable.
If you're brand new to gluten-free baking, our Confident Gluten-Free Baker Toolkit walks you through the fundamentals step by step — from flour blends to techniques — so you're not guessing your way through recipes.
How to prevent cross-contamination in your baking kitchen
Cross-contamination happens when gluten-containing particles transfer to gluten-free food through shared surfaces, tools, or airborne flour dust. Preventing it is the foundation of a safe gluten-free kitchen.
Surfaces and cleaning
Start with a thorough deep clean of your countertops, especially if you've been baking with wheat flour. Gluten doesn't break down with regular soap — you need to physically remove all flour residue. Wipe down counters with hot soapy water, paying special attention to cracks and grout lines in tile surfaces.
Before each gluten-free baking session, wipe down your workspace again. If you share a kitchen with gluten-containing baking, consider a dedicated silicone baking mat that you place on the counter as your clean work surface. This creates a physical barrier between your dough and any residual contamination.
Airborne flour is a real problem
Wheat flour stays airborne for up to 12 hours after being used. If someone in your household bakes with conventional flour, schedule your gluten-free baking for a different day, or at minimum wait several hours and wipe down all surfaces before starting. This is one of the most overlooked sources of contamination.
Shared appliances need extra attention
Your oven is generally safe after running at baking temperatures — heat doesn't destroy gluten, but a clean oven with no visible residue is fine. Toasters, however, are a major contamination source. Get a dedicated gluten-free toaster or use toaster bags. Stand mixers with textured attachment joints can trap flour, so either dedicate yours to gluten-free baking or clean attachments meticulously between uses.
Dedicated tools every gluten-free kitchen needs
Some tools can be shared safely after thorough cleaning (stainless steel bowls, metal whisks), while others should be dedicated gluten-free because they're porous or have crevices that trap flour particles.
Tools you should dedicate to gluten-free baking
| Tool | Why it needs to be dedicated | Safe to share? |
|---|---|---|
| Wooden spoons and rolling pins | Wood is porous and absorbs gluten proteins | No |
| Silicone spatulas | Micro-scratches trap particles over time | Risky |
| Colanders and strainers | Mesh traps flour in tiny openings | No |
| Cutting boards (wood or plastic) | Knife grooves harbor residue | No |
| Toaster | Impossible to fully clean crumb trays | No |
| Sifter or flour sieve | Mesh retains fine flour particles | No |
| Loaf pans (non-stick) | Scratched non-stick coatings trap residue | Risky |
For a complete breakdown of everything you need, check out our essential gluten-free baking equipment list. If you're just starting out and want a shorter, more focused list, our beginner's tool guide covers the 12 must-haves.
The tools that make the biggest difference
A good kitchen scale is non-negotiable. Gluten-free flours can vary by 30% or more in weight per cup depending on how they're scooped, so measuring by weight is the single easiest way to improve your results. We use the OXO Good Grips 11lb Food Scale and it's been rock solid for years.
An instant-read thermometer is the other game-changer, especially for bread. Gluten-free bread can look done on the outside while being gummy inside — a problem we cover in depth in our guide to gummy bread fixes. Internal temperature is the only reliable way to know your bread is fully baked.
If you bake bread regularly, investing in a quality loaf pan makes a noticeable difference in rise and crust formation.
Color-coding and labeling your tools
In a shared household, color-coding is your best friend. Buy gluten-free tools in a distinct color — bright green spatulas, a blue cutting board — so everyone in the house can instantly tell which tools are safe. Label your dedicated tools with a permanent marker or use colored tape. It sounds simple, but it's the most effective way to prevent accidental mix-ups.
How to stock a gluten-free baking pantry
A well-stocked pantry means you can bake most recipes without a special shopping trip. Here's what to keep on hand, organized by category.
Core flours and starches
You don't need every gluten-free flour that exists — start with these essentials that cover the widest range of recipes:
| Ingredient | Role in baking | Best for |
|---|---|---|
| Brown rice flour | Base flour, mild flavor | All-purpose blends, bread, cookies |
| Tapioca starch | Adds chew and elasticity | Bread, pizza dough, pie crust |
| Potato starch | Adds moisture and lightness | Cakes, muffins, bread |
| Almond flour | Adds fat, moisture, protein | Cookies, cakes, muffins |
| Buckwheat flour | Adds depth and nutrition | Pancakes, rustic breads |
If you prefer the convenience of a pre-made blend, we've reviewed several options including the King Arthur gluten-free product line, which is a solid starting point for beginners.
Binders
Without gluten to hold things together, you need a binder in almost every recipe. The two most common options are xanthan gum and psyllium husk, and they behave very differently. Keep both on hand — xanthan gum works best in cookies and cakes, while psyllium husk is superior for bread. Our complete binder guide breaks down when to use each one.
Leavening agents
Stock baking powder, baking soda, and active dry yeast. One important note: always check that your baking powder is labeled gluten-free, as some brands use wheat starch as a filler. We covered the safe brands in our baking soda safety guide (which also covers baking powder).
Other pantry essentials
- Apple cider vinegar — helps activate baking soda and improves bread rise
- Eggs — provide structure, moisture, and leavening (see our guide to egg functions if you're curious why they're so critical)
- Neutral oil (avocado or canola) — adds moisture without competing flavors
- Sugar, brown sugar, honey — for sweetness and moisture retention
- Salt — strengthens structure and enhances flavor
- Vanilla extract — a must for cakes, cookies, and muffins
How to organize a shared kitchen for gluten-free baking
The best organization system is one that's obvious to everyone in the household, not just the person who set it up. Here's how to make it work.
Designate a gluten-free zone
Claim a specific shelf in your pantry, a cabinet, or a section of counter space as the gluten-free zone. Everything in this area — flours, starches, binders, dedicated tools — should be exclusively gluten-free. If possible, choose an upper shelf so conventional flour dust doesn't settle down onto your ingredients.
Airtight, labeled containers are essential
Transfer all flours and starches into airtight containers immediately after opening. This does double duty: it prevents cross-contamination from airborne particles, and it keeps your flours fresh longer (gluten-free flours, especially nut-based ones, go rancid faster than wheat flour). Label every container clearly with the flour name and the date you opened it.
We like the OXO POP containers because they seal tightly and stack well, but any airtight container with a secure lid works. The key is consistency — if it's not labeled, it's not safe.
Create a baking station
Keep your most-used tools — scale, measuring spoons, spatulas, mixing bowls — together in one spot near your work surface. When everything has a home, you spend less time hunting for tools and more time actually baking. A small rolling cart works well if counter space is limited.
Common mistakes when setting up a gluten-free kitchen
We see the same mistakes come up over and over with new gluten-free bakers. Avoiding these from the start saves a lot of frustration.
- Buying too many specialty flours at once. Start with a basic blend or 4-5 core flours. Gluten-free flours are expensive and have shorter shelf lives. Build your collection as you figure out what you actually bake most.
- Assuming "wheat-free" means gluten-free. Barley, rye, and some oats contain gluten. Always look for certified gluten-free labels on ingredients.
- Skipping the scale. We cannot stress this enough. Cup measurements are unreliable for gluten-free flours. A scale costs less than a bag of almond flour and will improve every single thing you bake. See our measuring guide for more on why this matters.
- Not cleaning the stand mixer thoroughly. Flour gets trapped around the attachment hub and in the bowl's locking mechanism. Take it apart and clean every crevice.
- Forgetting about condiments. Shared butter, jam, and peanut butter jars can be contaminated by knives that touched regular bread. Use squeeze bottles or dedicated jars.
For a broader look at baking pitfalls, our 10 common gluten-free baking mistakes post covers technique errors that trip up beginners.
Budget-friendly tips for setting up your kitchen
Going gluten-free can feel expensive, but it doesn't have to break the bank if you're strategic about it.
- Buy flours in bulk online — specialty stores charge a premium. Amazon, Thrive Market, and even Costco carry gluten-free flours at much better prices.
- Make your own flour blend — a basic blend of rice flour, tapioca starch, and potato starch costs a fraction of pre-made blends and works just as well for most recipes.
- Replace tools gradually — you don't need to buy everything at once. Start with a dedicated cutting board, a set of silicone spatulas, and a sifter. Add more as your budget allows.
- Store flours in the freezer — nut flours (almond, coconut) last months longer when frozen, which means less waste.
- Use what you have — stainless steel bowls, metal whisks, and glass baking dishes can be shared safely after proper cleaning. Focus your spending on porous items that truly need to be dedicated.
Your gluten-free kitchen setup checklist
Here's a quick-reference checklist to make sure you've covered all the bases:
- Deep clean all surfaces, especially countertops and the inside of your oven
- Designate a gluten-free shelf or cabinet (upper shelf preferred)
- Replace or dedicate porous tools (wooden spoons, cutting boards, sifters, colanders)
- Buy airtight, labeled containers for all flours and starches
- Stock core flours: rice flour, tapioca starch, potato starch, and one nut or specialty flour
- Get at least one binder (xanthan gum for general baking, psyllium husk for bread)
- Buy a kitchen scale — this is not optional
- Get an instant-read thermometer for bread baking
- Color-code or label dedicated gluten-free tools
- Establish household rules for shared condiments and appliances
Frequently asked questions
Do I need a completely separate kitchen for gluten-free baking?
No, you don't need a separate kitchen. Most people successfully bake gluten-free in shared kitchens by dedicating porous tools, using separate storage containers, and following consistent cleaning practices. The key is having clear systems — labeled tools, a designated gluten-free shelf, and household rules about shared items like toasters and condiment jars.
What kitchen tools can be safely shared between gluten-free and regular baking?
Non-porous items like stainless steel mixing bowls, metal whisks, glass baking dishes, and metal measuring cups can be shared after thorough washing. Porous or textured items — wooden spoons, silicone spatulas, plastic cutting boards, non-stick pans with scratches, and mesh strainers — should be dedicated to gluten-free use only. Check our essential equipment list for a complete breakdown.
What are the most important gluten-free pantry staples to buy first?
Start with a good all-purpose gluten-free flour blend (or the ingredients to make your own: brown rice flour, tapioca starch, and potato starch), xanthan gum, baking powder, baking soda, and eggs. These five items let you make the widest range of recipes. Add almond flour and psyllium husk powder as your next purchases.
How do I prevent airborne flour contamination in a shared kitchen?
Wheat flour can remain airborne for up to 12 hours after use. The safest approach is to bake gluten-free on a different day than anyone bakes with wheat flour. If that's not possible, wait at least several hours, then wipe down all surfaces with hot soapy water before starting. Keep your gluten-free flours in sealed containers and store them away from areas where wheat flour is used.
Is it worth buying a pre-made gluten-free flour blend or should I make my own?
Both approaches work well. Pre-made blends like King Arthur Measure for Measure are convenient and consistent, making them great for beginners. Making your own blend is significantly cheaper and lets you customize ratios for different types of baking. Many experienced gluten-free bakers do both — keeping a commercial blend on hand for quick bakes while mixing custom blends for bread and specialty recipes.

Written by
Co-founder, BakingSubs
Co-founder of BakingSubs, where he turns the science of ingredient substitutions into tested, reliable guidance for home bakers.
Related Posts
How to Ship Baked Goods That Arrive Fresh: 9 Operator-Tested Methods That Cut Damage Claims by 80%
How Much Does Bakery Insurance Actually Cost? Real Numbers From 6 Policy Types
How to Manage Rush Orders as a Home Baker (Without Wrecking Your Week or Your Margins)
Bake with Confidence
See all
Confident Gluten-Free Baker Toolkit
The science-based system that replaces gluten's seven invisible jobs so your baking turns out soft, fluffy, and foolproof — every time.

Gluten-Free Recipe Vault
Instant access to our complete library of proven gluten-free recipes — no waiting, no guesswork, just results that work tonight.

Fix Your Gluten-Free Bread
Learn the 3-step formula to make bread rise and stay soft, discover why your loaves collapse, and get a tested sandwich bread recipe that actually works.