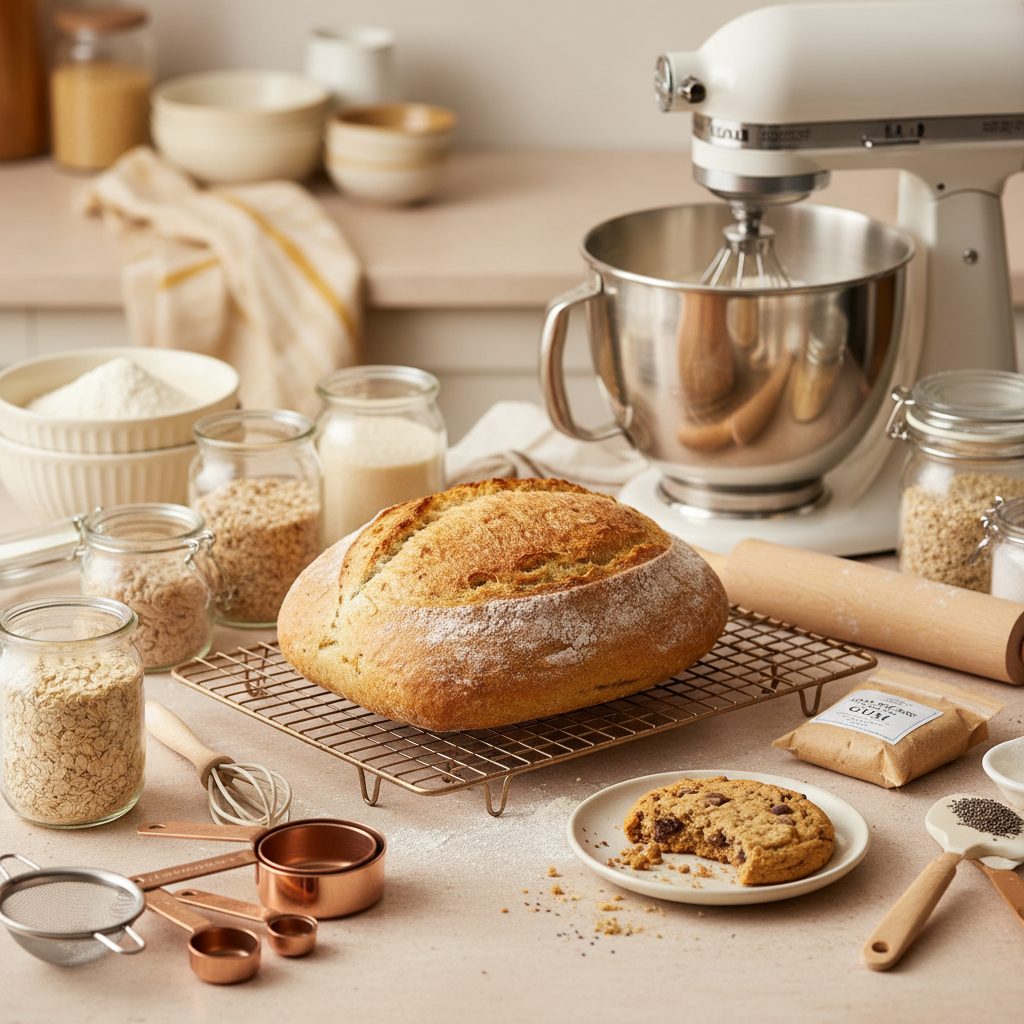
Starting gluten-free baking without the right tools is like trying to build furniture without a tape measure — you might get something functional, but it won't be pretty. Here are the 12 gluten-free baking tools for beginners that will make your first batches come out right.
Key takeaways
- A digital kitchen scale is the single most important tool for gluten-free baking because gluten-free flours vary dramatically in weight per cup.
- Silicone spatulas and whisks are essential for working with gluten-free batters, which tend to be stickier and wetter than conventional doughs.
- An oven thermometer can prevent most common texture problems — off-temperature ovens are a top reason gluten-free bakes fail.
- You don't need to spend a fortune; focus on a few quality basics rather than buying every gadget.
- Dedicated gluten-free tools help prevent cross-contamination if you share a kitchen with gluten-containing ingredients.
Why gluten-free baking needs different tools
Gluten-free baking is more sensitive to measurement errors, temperature swings, and mixing techniques than conventional baking. Without gluten's forgiving structure, small mistakes get amplified. The right tools help you control the variables that matter most — accurate measurements, consistent oven temperatures, and proper mixing — so you can focus on learning rather than troubleshooting.
If you've already run into issues like texture problems or sinking cakes, there's a good chance your tools (or lack thereof) played a role. Let's fix that.
The 12 essential gluten-free baking tools for beginners
We've broken these into three categories: measurement tools, mixing and prep tools, and baking tools. If your budget is tight, start with the first four — they'll make the biggest difference.
1. Digital kitchen scale
This is the number one tool we recommend for every gluten-free baker, bar none. Gluten-free flours can vary by 20-30% in weight per cup depending on how you scoop them. A cup of rice flour scooped loosely versus packed tightly can mean the difference between a tender muffin and a brick.
We use the OXO Good Grips 11lb Food Scale and it's been rock solid for years. It has a pull-out display so large bowls don't block the screen, and it toggles between grams and ounces instantly. For a deeper dive on why weighing matters, check out our beginner's guide to measuring baking ingredients.
2. Oven thermometer
An oven thermometer is the cheapest investment that solves the most problems. Most home ovens are off by 15-25 degrees, and gluten-free baked goods are far less forgiving of temperature inaccuracies. Too hot and you get a burned crust with a gummy middle. Too cool and you get a flat, dense result.
A basic Rubbermaid stainless steel oven thermometer costs under $10 and lasts forever. Hang it on your oven rack and check it every time you preheat.
3. Set of measuring spoons and cups (for small amounts)
Even though we strongly recommend weighing flour and sugar, you'll still need measuring spoons for leaveners, salt, baking powder, and binders like xanthan gum or psyllium husk. These small quantities matter a lot — a half teaspoon too much baking powder can cause your bread to rise and then collapse.
Look for a set that includes 1/8 teaspoon. Many gluten-free recipes call for precise small measurements that standard four-piece sets don't cover.
4. Instant-read thermometer
Knowing when gluten-free bread is truly done is tricky because it often looks done on the outside while the inside is still underbaked. An instant-read thermometer takes the guesswork out entirely. Most gluten-free breads are done at 205-210 degrees F internally.
The ThermoWorks ThermoPop reads in about 3 seconds and is accurate to within a degree. It's a game-changer for anyone who's struggled with gummy centers.
If you're building your toolkit from scratch, our Confident Gluten-Free Baker Toolkit walks you through everything you need to get started with confidence — from tools to techniques to troubleshooting.
5. Silicone spatulas (at least two)
Gluten-free batters are often wetter and stickier than conventional batters, which means you need spatulas that can scrape every last bit from the bowl. Silicone spatulas are non-stick, heat-resistant, and easy to clean — and they won't harbor gluten residue in cracks like wooden spoons can.
Get at least two: a large one for folding batters and a small one for scraping jars and measuring cups. If you share a kitchen with gluten bakers, dedicate these to gluten-free use only.
6. Whisk (balloon style)
A good balloon whisk serves double duty in gluten-free baking. First, you need it to thoroughly whisk together your dry ingredients. Gluten-free flour blends contain multiple flours and starches that need to be evenly distributed before they hit the wet ingredients. Second, many gluten-free batters benefit from vigorous whisking to incorporate air — unlike conventional baking, you're not worried about developing too much gluten.
7. Stand mixer or hand mixer
While not strictly essential for every recipe, a mixer makes gluten-free baking significantly easier. Gluten-free bread doughs in particular need extended mixing (3-5 minutes) to properly hydrate starches and activate binders. Doing this by hand is exhausting and inconsistent.
If you're on a budget, a reliable hand mixer works perfectly well. The KitchenAid 5-Speed Hand Mixer handles thick gluten-free batters without straining. If you plan to bake bread regularly, a stand mixer is worth the investment down the road.
8. Light-colored metal baking pans
Dark pans absorb more heat and can overbrown gluten-free baked goods before the interior is cooked through. Light-colored aluminum or aluminized steel pans distribute heat more evenly, which is critical when you're working without gluten's structural support.
At minimum, start with an 8.5 x 4.5 inch loaf pan and an 8-inch or 9-inch round cake pan. A standard muffin tin is also useful for gluten-free muffins, which are one of the most beginner-friendly things to bake.
9. Parchment paper and silicone baking mats
Gluten-free baked goods stick more aggressively than their conventional counterparts. Parchment paper is your best friend for lining pans — it makes removal effortless and cleanup a breeze. For cookie sheets, a Silpat silicone baking mat is a reusable option that provides even heat distribution and zero sticking.
10. Fine-mesh sieve
Sifting gluten-free flour blends through a fine-mesh sieve breaks up clumps and aerates the flour, leading to lighter, more even baked goods. This is especially important for blends containing tapioca starch or potato starch, which tend to clump. It also helps when you're combining multiple flours from different bags to create your own blend.
11. Cooling rack
Gluten-free baked goods are more fragile when hot and more prone to becoming soggy on the bottom if left in the pan too long. A wire cooling rack allows air to circulate underneath, preventing condensation from making the bottom of your bread or cake damp. Let items cool in the pan for 10-15 minutes, then transfer to the rack.
12. Airtight storage containers
Gluten-free baked goods stale faster than conventional ones because they lack gluten's moisture-trapping network. Proper storage extends freshness significantly. Glass containers with silicone-sealed lids work well and won't absorb odors. For bread, slicing and freezing individual portions in airtight bags is the best strategy for long-term freshness. Learn more about why this happens in our guide to quick staling in gluten-free baking.
Quick reference: beginner tool priority list
| Priority | Tool | Approximate cost | Why it matters |
|---|---|---|---|
| Must-have | Digital kitchen scale | $25-35 | Eliminates the biggest source of measurement error |
| Must-have | Oven thermometer | $5-10 | Prevents under/overbaking from inaccurate ovens |
| Must-have | Instant-read thermometer | $15-35 | Confirms doneness without guessing |
| Must-have | Measuring spoons | $8-15 | Accurate small measurements for leaveners/binders |
| High priority | Silicone spatulas | $8-15 | Handles sticky batters, prevents cross-contamination |
| High priority | Whisk | $8-12 | Evenly distributes dry ingredients and incorporates air |
| High priority | Parchment paper/silicone mats | $5-20 | Prevents sticking without greasing |
| High priority | Light-colored baking pans | $10-25 each | Even heat distribution, prevents overbrowning |
| Worth investing in | Stand or hand mixer | $30-350 | Consistent mixing, essential for bread |
| Worth investing in | Fine-mesh sieve | $8-15 | Breaks up clumps for lighter texture |
| Worth investing in | Cooling rack | $10-15 | Prevents soggy bottoms |
| Worth investing in | Airtight containers | $15-30 | Extends freshness of finished bakes |
Tools to skip when you're starting out
You don't need everything at once. Here are a few things that are nice to have eventually but aren't necessary when you're just getting started:
- Bread machine — Learn the basics by hand (or with a mixer) first so you understand how the dough should look and feel.
- Specialty cake decorating tools — If you need to pipe frosting, check out our guide on household items that work as piping bags.
- Expensive flour sifter — A fine-mesh sieve does the same job for less money.
- Proofing box — Your oven with the light on works just fine for proofing gluten-free bread dough.
How to prevent cross-contamination with your tools
If you share a kitchen with someone who bakes with wheat flour, cross-contamination is a real concern — especially for those with celiac disease. Wooden utensils, cutting boards, and even scratched non-stick pans can harbor gluten residue that's impossible to wash away completely.
The safest approach is to dedicate a set of tools exclusively for gluten-free baking. Label them clearly. At minimum, keep separate:
- Wooden spoons and rolling pins (porous materials trap gluten)
- Colanders and sieves (flour gets trapped in mesh)
- Baking pans with scratched surfaces
- Toasters (use a dedicated gluten-free toaster or toaster bags)
Non-porous tools like stainless steel whisks and silicone spatulas can be shared if washed thoroughly, but having dedicated tools removes all doubt. For more on common pitfalls, see our post on 10 gluten-free baking mistakes and the fixes that actually work.
Frequently asked questions
What is the most important tool for gluten-free baking?
A digital kitchen scale is the most important tool for gluten-free baking. Gluten-free flours vary significantly in density, so measuring by weight rather than volume eliminates the most common source of recipe failures. It's inexpensive and makes an immediate difference in consistency.
Do I need separate baking tools for gluten-free cooking?
If you or someone in your household has celiac disease, yes — you should have dedicated tools for gluten-free baking. Porous materials like wood and scratched non-stick coatings can trap gluten particles. Non-porous tools like stainless steel and silicone can be shared if washed thoroughly, but separate tools are the safest approach.
Can I use regular baking pans for gluten-free baking?
You can use regular baking pans for gluten-free baking, but light-colored metal pans work best. Dark pans absorb more heat and can cause overbrowning before the interior is fully baked. If your pans are heavily scratched and you're concerned about cross-contamination, consider replacing them with new ones dedicated to gluten-free use.
Why does gluten-free baking require a thermometer?
Gluten-free baked goods often look done on the outside while remaining underbaked inside. An instant-read thermometer lets you check the internal temperature — most gluten-free breads should reach 205-210 degrees F. Without one, you're guessing, which frequently leads to gummy centers or overbaked crusts.
How much should I spend on gluten-free baking tools as a beginner?
You can get started with quality basics for about $75-100. A digital scale ($25-35), oven thermometer ($5-10), instant-read thermometer ($15-35), silicone spatulas ($10-15), and parchment paper ($5) cover the essentials. Add a hand mixer and a couple of light-colored pans when your budget allows, and you'll have everything you need for most recipes.

Written by
Co-founder, BakingSubs
Co-founder of BakingSubs, where he turns the science of ingredient substitutions into tested, reliable guidance for home bakers.
Related Posts
How to Ship Baked Goods That Arrive Fresh: 9 Operator-Tested Methods That Cut Damage Claims by 80%
How Much Does Bakery Insurance Actually Cost? Real Numbers From 6 Policy Types
How to Manage Rush Orders as a Home Baker (Without Wrecking Your Week or Your Margins)
Bake with Confidence
See all
Confident Gluten-Free Baker Toolkit
The science-based system that replaces gluten's seven invisible jobs so your baking turns out soft, fluffy, and foolproof — every time.

Gluten-Free Recipe Vault
Instant access to our complete library of proven gluten-free recipes — no waiting, no guesswork, just results that work tonight.

Fix Your Gluten-Free Bread
Learn the 3-step formula to make bread rise and stay soft, discover why your loaves collapse, and get a tested sandwich bread recipe that actually works.