
Stretch and Fold Technique in Sourdough: Why 80% of Beginners Fold at the Wrong Time
The stretch and fold technique in sourdough builds gluten without kneading — but timing, hydration, and set count matter more than most guides admit. Here's what actually works.

Malik
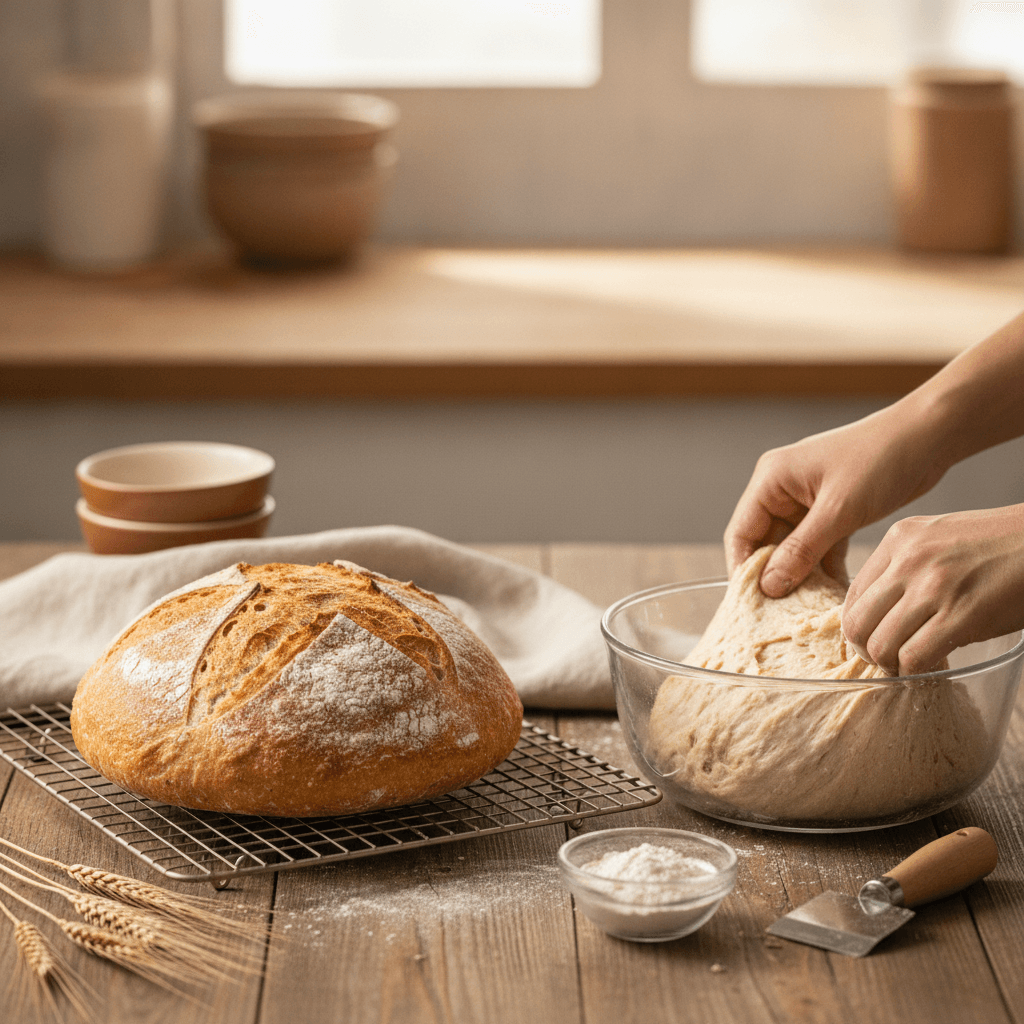
The stretch and fold technique in sourdough replaces traditional kneading, building gluten strength in short bursts over several hours. But timing, hydration, and the number of sets matter more than most guides let on — and getting them wrong produces a flat, dense loaf that no amount of oven spring can save.
Key takeaways
Stretch and fold develops gluten without overworking the dough, typically done in 4 to 6 sets spaced 30 minutes apart during bulk fermentation.
Each set takes roughly 30 to 60 seconds — the technique is about consistency over time, not effort in the moment.
Wet hands (not floured hands) are essential to prevent tearing and sticking, especially at hydration levels above 75%.
Stopping too early (fewer than 3 sets) often leaves the dough slack and unable to hold shape during final proof.
Higher-hydration doughs generally need more sets, while stiffer doughs around 65% hydration may only need 3.
The technique works differently with alternative flours — gluten-free bakers need entirely different structural strategies.
What the stretch and fold actually does to sourdough dough
Stretch and fold aligns gluten strands into an organized network without generating the friction and heat that come from 10 to 15 minutes of continuous kneading. Each time you pull the dough upward and fold it back onto itself, you're layering gluten strands in new directions. Over multiple sets, this creates a web strong enough to trap the carbon dioxide your starter produces.
The technique also incorporates air into the dough. That's why you'll notice the dough becoming visibly more aerated and jiggly after the third or fourth set — it's not just stronger, it's also lighter. This dual function (structure plus aeration) is what makes stretch and fold the preferred method for high-hydration sourdough, where traditional kneading would turn the dough into a sticky, unmanageable mess.
There's a common misconception that more folds always mean better bread. That's not true. Over-folding can actually degas the dough, knocking out the fermentation bubbles you've been building. The goal is to fold enough to create structure, then stop and let fermentation do its work.
How to perform a stretch and fold (step by step)
The mechanics are simple, but precision matters. Here's what each set looks like:
Wet your hands thoroughly. Dip them in a bowl of water — not flour. Flour on the surface creates dry spots that don't integrate well, especially in high-hydration doughs above 75%.
Reach under one side of the dough. Grab the bottom edge and stretch it upward as far as it will go without tearing. You're looking for roughly 15 to 20 centimeters of stretch on a typical 1-kilogram batch.
Fold it over to the opposite side. Lay it gently — don't slam it down.
Rotate the bowl 90 degrees and repeat. One complete set means stretching and folding from all four sides (north, south, east, west).
Cover and rest. The rest period between sets is where the real gluten development happens. The protein strands relax and rebond in their new positions.
Each set takes about 30 to 60 seconds. The entire process, spread across bulk fermentation, adds up to maybe 4 minutes of hands-on work total. That's one reason sourdough bakers prefer this method — it fits into a normal day without demanding 15 uninterrupted minutes of kneading.
How many sets do you actually need?
This depends on three variables: hydration level, flour type, and how active your starter is.
Hydration level | Recommended sets | Spacing | Notes |
|---|---|---|---|
60–65% | 3–4 | 30 minutes | Dough is stiff; fewer folds needed for structure |
70–75% | 4–5 | 30 minutes | Most common range for home sourdough bakers |
78–85% | 5–6 | 20–30 minutes | High hydration; dough needs more help holding shape |
85%+ | 6+ | 15–20 minutes | Very wet doughs; consider coil folds after initial sets |
A baker named Rachel, who sells sourdough at a weekend market in Portland, shared on a baking forum that she switched from doing 4 sets to 6 sets on her 80% hydration country loaves and saw noticeably better oven spring. Her loaves went from spreading sideways during baking to holding a taller profile. The extra two sets added about 90 seconds of work to her entire process.
The spacing matters as much as the number. Folding every 10 minutes doesn't give the gluten enough time to relax and rebond. Folding every 60 minutes means you're letting the dough develop too much slack between interventions. For most home bakers working with bread flour at 72% hydration, 4 sets spaced 30 minutes apart is a reliable starting point.
Stretch and fold vs. coil fold: when to use each
Coil folds are often presented as interchangeable with stretch and folds, but they serve slightly different purposes. A coil fold involves lifting the dough from the center and letting the edges fold underneath from gravity, rather than actively pulling and folding.
The key difference: coil folds are gentler. They're better suited for later in bulk fermentation (after the third or fourth set of stretch and folds) when the dough has already developed significant structure and you don't want to degas it. They're also easier to perform on very wet doughs above 80% hydration, where stretch and folds can feel like wrestling a jellyfish.
A practical approach that many experienced sourdough bakers use: start with 2 to 3 sets of stretch and folds in the first 60 to 90 minutes of bulk fermentation, then switch to 2 to 3 coil folds for the remaining sets. This builds strong initial structure without deflating the dough as fermentation accelerates.
The timing mistake most beginners make
Here's the contrarian take: the biggest problem isn't technique — it's when people stop folding relative to fermentation progress.
Most beginners follow a rigid schedule (fold every 30 minutes, 4 times, done) without reading the dough. But if your kitchen is 18 degrees Celsius instead of 24 degrees, that same schedule produces underdeveloped gluten because the dough hasn't had enough fermentation activity to complement the mechanical structure you're building. Conversely, in a warm kitchen at 28 degrees, the dough might be fermenting so fast that you need to compress your fold schedule into the first 90 minutes and then leave it alone.
The better approach is to use the windowpane test after your third set. Pinch off a small piece of dough and gently stretch it between your fingers. If you can stretch it thin enough to see light through it without it tearing, you've developed enough gluten and can stop folding. If it tears immediately, you need more sets.
Temperature is the variable most guides underestimate. A 6-degree difference in ambient temperature can change bulk fermentation time by 2 to 3 hours. Your fold schedule needs to flex with that reality, not follow a clock blindly.
Why stretch and fold doesn't work the same way with gluten-free flours
If you're baking gluten-free sourdough, the stretch and fold technique doesn't apply in the traditional sense. There's no gluten network to develop, so pulling and folding the dough won't create the structural web that traps gas in wheat-based bread.
Gluten-free sourdough bakers rely on different structural strategies entirely. Binders like psyllium husk powder and xanthan gum create a gel-like matrix that mimics some of gluten's gas-trapping ability. The dough is typically much wetter — more like a thick batter than a shapeable mass — and it goes straight into a pan rather than being shaped freeform.
Some gluten-free bakers do a modified version where they stir the batter vigorously at intervals during bulk fermentation to redistribute the starter and incorporate air. But this is functionally different from a stretch and fold. If you're working with flours like brown rice flour, buckwheat flour, or cassava flour, the challenge isn't gluten development — it's preventing a gummy center and achieving a decent rise without the elastic protein network that wheat provides.
This is one of the hardest adjustments for bakers transitioning from wheat sourdough to gluten-free. The instinct to fold and shape is strong, but gluten-free doughs simply don't respond to it. Understanding how gluten-free baking works at a structural level is essential before attempting sourdough without wheat.
Common stretch and fold problems (and what's actually going wrong)
Dough tears when you stretch it
This usually means the gluten hasn't had enough time to relax between sets. If you're folding every 15 minutes with a low-hydration dough, the gluten strands are still taut from the previous fold. Try extending to 30 or even 45 minutes between sets. Also check your flour — lower protein flours like all-purpose flour (typically 10 to 12% protein) develop less extensible gluten than bread flour (12 to 14% protein), so they tear more easily under aggressive stretching.
Dough doesn't hold its shape after folding
If the dough immediately slumps flat after each fold, you likely need more sets or your hydration is higher than you think. Weighing water with a kitchen scale rather than measuring by volume eliminates a common source of error — a cup of water can vary by 15 to 20 grams depending on how you pour it.
Dough feels tight and won't stretch
This is the opposite problem: too much gluten development or not enough hydration. If the dough resists stretching after only 2 sets, it's telling you the gluten is already well-developed. You can likely skip additional sets and let fermentation take over. Forcing more folds at this point risks tearing the dough or creating an overly tight crumb.
Dough sticks to everything
Wet your hands more frequently — every single time you touch the dough. Some bakers keep a bowl of water right next to their dough container and dip their hands before each fold. Resist the urge to add flour. Adding flour to a high-hydration dough changes the hydration percentage and creates dry pockets that don't ferment evenly.
How stretch and fold fits into the full sourdough timeline
The fold sets happen during bulk fermentation, which is the longest phase of sourdough bread making. Here's where they sit in a typical timeline for a baker working at room temperature around 22 to 24 degrees Celsius:
Time | Step | Notes |
|---|---|---|
0:00 | Some bakers autolyse (flour + water only) for 30–60 minutes first | |
0:30 | Set 1: stretch and fold | Dough will feel shaggy and loose |
1:00 | Set 2: stretch and fold | Noticeably smoother and more cohesive |
1:30 | Set 3: stretch and fold | Dough should start feeling airy |
2:00 | Set 4: stretch and fold or coil fold | Do the windowpane test — stop if it passes |
2:00–5:00 | Undisturbed bulk fermentation | Let the starter do its work; dough should grow 50–75% in volume |
5:00 | Pre-shape | Gentle shaping on an unfloured surface |
5:20 | Final shape | Tighter shaping into a boule or batard |
5:30+ | Cold retard in refrigerator | 12–18 hours for flavor development |
The autolyse step — mixing just flour and water before adding the starter and salt — gives the flour time to fully hydrate. This makes the subsequent stretch and folds more effective because the gluten strands are already partially formed before you start manipulating them. An autolyse of 30 to 60 minutes is standard, though some bakers extend it to 2 hours for whole grain flours that absorb water more slowly.
Does the container matter?
Yes, more than most people think. A straight-sided, transparent container makes it dramatically easier to judge both dough development and fermentation progress. Round containers work fine for the folds themselves, but square or rectangular containers make it easier to grab the dough from the sides.
A clear container with volume markings — like a Cambro 4-quart container — lets you track exactly how much the dough has risen during bulk fermentation. Eyeballing rise in an opaque bowl is unreliable. Many bakers mark the starting level with a rubber band or dry-erase marker and watch for the 50 to 75% increase that signals bulk fermentation is complete.
When to skip stretch and fold entirely
Not every sourdough approach uses stretch and folds. Some bakers, particularly those following the Tartine method, rely heavily on them. Others use a stand mixer for initial gluten development and then do only 1 to 2 folds during bulk. And some traditional European sourdough breads — particularly dense rye breads — skip folding entirely because rye flour doesn't form the same elastic gluten network that wheat does.
If you're making a sourdough with more than 50% rye flour, stretch and folds won't do much. Rye's gluten proteins (secalin and gliadin) don't form the extensible, elastic network that wheat's glutenin and gliadin create. Rye sourdough relies more on the gel-forming properties of pentosans (a type of fiber in rye) for structure. Folding a rye-heavy dough can actually break down what little structure exists.
Similarly, if you're working with low-carb flour alternatives for bread, the stretch and fold technique won't apply because those flours lack gluten entirely.
Frequently asked questions
Frequently asked questions
How many stretch and folds for sourdough bread?
Most sourdough bakers do 4 to 6 sets of stretch and folds during bulk fermentation, spaced about 30 minutes apart. The exact number depends on hydration level and flour type — higher-hydration doughs above 78% typically need more sets than stiffer doughs around 65%. Use the windowpane test after your third set to check if the gluten is sufficiently developed.
Can you do too many stretch and folds?
Yes. Over-folding degasses the dough, removing the carbon dioxide bubbles that your sourdough starter has been producing. If the dough already passes the windowpane test and feels smooth and elastic, additional folds will do more harm than good. Most bakers find that 6 sets is the practical maximum for even very wet doughs.
What is the difference between stretch and fold and coil fold in sourdough?
Stretch and fold involves actively pulling the dough upward and folding it over, while coil fold lifts the dough from the center and lets the edges tuck underneath from gravity. Coil folds are gentler and better suited for later in bulk fermentation when the dough is more aerated and you want to avoid degassing it. Many bakers start with stretch and folds and switch to coil folds after the third set.
Do you stretch and fold sourdough after autolyse?
The autolyse step (mixing flour and water without starter or salt) happens before stretch and folds begin. After the autolyse, you add the starter and salt, mix them in, and then begin your stretch and fold sets. The autolyse gives the flour time to hydrate, which makes the subsequent folds more effective at building gluten structure.
Can you stretch and fold gluten-free sourdough?
No, not in the traditional sense. Gluten-free flours don't contain the proteins that form an elastic, extensible network when stretched and folded. Gluten-free sourdough relies on binders like psyllium husk powder or xanthan gum for structure, and the dough is typically handled more like a batter. Check our gluten-free baking guide for alternative structural strategies.

Written by
Co-founder, BakingSubs
Co-founder of BakingSubs, where he turns the science of ingredient substitutions into tested, reliable guidance for home bakers.
Related Posts
Collagen Powder in Baking as Flour Supplement: Why It Mostly Fails (and 3 Ways to Make It Work)
Lupin Flour as a Low Carb Flour Substitute: 5 Things That Change (and 3 That Can Go Wrong)
Bran as Flour Supplement for High Fiber Baking: 5 Types Compared (and How Much You Can Actually Add)
Bake with Confidence
See all
Confident Gluten-Free Baker Toolkit
The science-based system that replaces gluten's seven invisible jobs so your baking turns out soft, fluffy, and foolproof — every time.

Gluten-Free Recipe Vault
Instant access to our complete library of proven gluten-free recipes — no waiting, no guesswork, just results that work tonight.

Fix Your Gluten-Free Bread
Learn the 3-step formula to make bread rise and stay soft, discover why your loaves collapse, and get a tested sandwich bread recipe that actually works.