

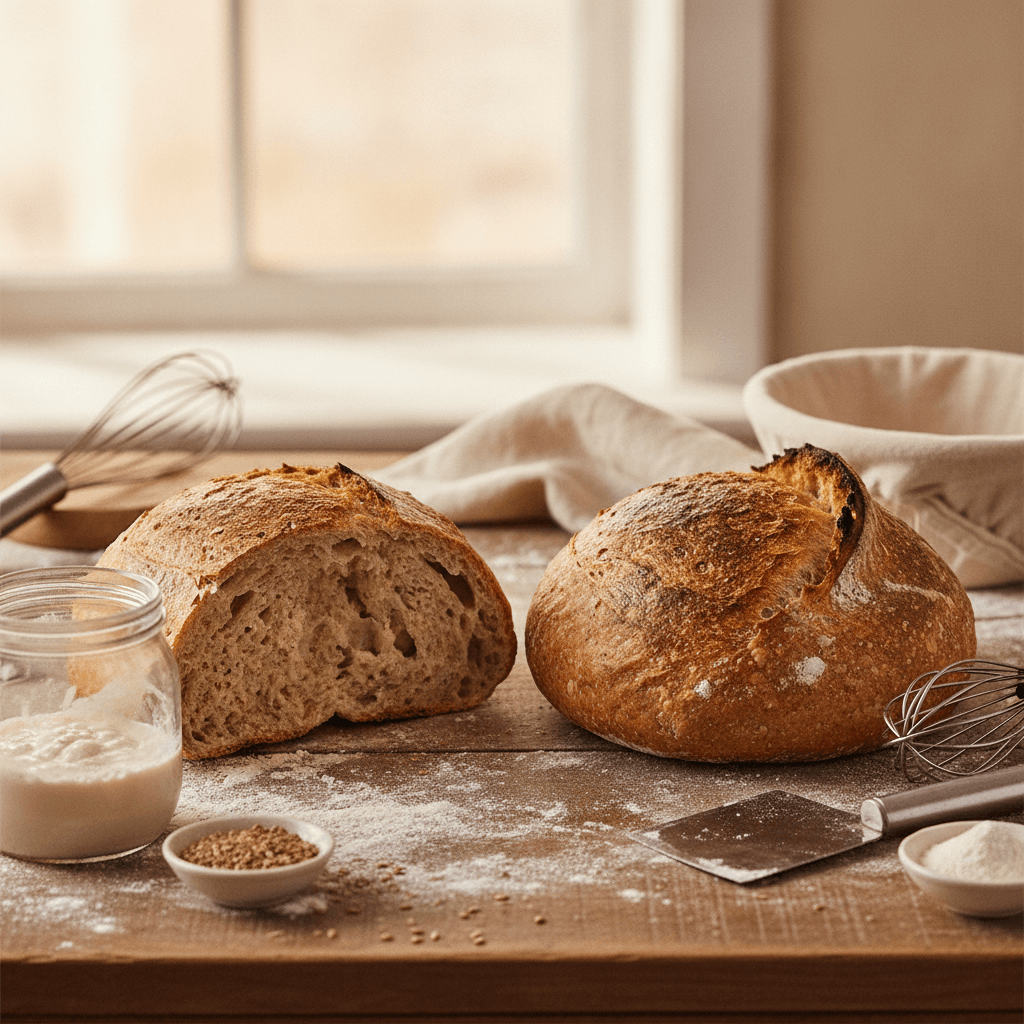
Proofing is where most sourdough loaves succeed or fail, and the difference between overproofed and underproofed dough comes down to a handful of visual and textural signs you can learn to read. Here's how to diagnose what happened to your last bake — and what to change next time.
Key takeaways
Overproofed sourdough has a flat profile, large irregular holes near the crust, and a dense, gummy interior because the gluten network has broken down.
Underproofed sourdough has a tight, heavy crumb with thick walls between small, unevenly distributed air pockets and often tears or blows out along the score.
The poke test is a reliable field check: dough that springs back immediately is underproofed; dough that doesn't spring back at all is overproofed; dough that springs back slowly (over about 2-3 seconds) is ready.
Ambient temperature matters more than clock time — dough at 28°C (82°F) can overproof in half the time it takes at 21°C (70°F).
Cold proofing in the refrigerator (3-5°C / 38-41°F) slows fermentation dramatically, giving you a wider window before overproofing occurs.
Gluten-free sourdough is even more sensitive to proofing errors because there's no gluten network to trap gas — poor rise is the most common result.
What happens during sourdough proofing
Proofing (also called final rise or final fermentation) is the stage after you shape your dough and before it goes into the oven. During this window, the wild yeast and lactic acid bacteria in your starter continue to produce carbon dioxide gas. That gas inflates the gluten network — or, in gluten-free doughs, whatever binder structure you've built — creating the open crumb bakers chase.
The catch is that this process has a peak. Before the peak, the dough is underproofed: there isn't enough gas yet, and the structure is still too tight. Past the peak, the dough is overproofed: the gluten strands have stretched beyond their limit and begin to break, the dough deflates, and acids accumulate to the point where they further weaken the structure.
Think of it like a balloon. Underproofed is a balloon you barely blew into. Overproofed is a balloon you stretched so far the rubber went thin and started to sag. The sweet spot is right before maximum inflation, when the structure is expanded but still has enough tension to hold.
How to tell if your sourdough is overproofed
An overproofed loaf announces itself in several ways, and you can usually spot the signs before baking, during baking, and after slicing.
Before baking
The shaped dough looks flat and spread out in its banneton or on the counter. When you turn it out, it doesn't hold its shape — it pancakes. The surface may feel sticky and slack rather than taut. If you do the poke test (press a floured finger about 1 cm into the dough), the indent stays and doesn't bounce back at all. The dough may also smell strongly of acetic acid — a sharp, vinegar-like smell rather than the mild, pleasantly sour aroma of properly fermented dough.
During and after baking
Overproofed loaves get minimal oven spring. The score lines barely open because there's not enough residual gas pressure to push the crust upward. The finished loaf is flat on top, sometimes concave. When you slice it, you'll often see a dense, gummy layer near the bottom and a few very large, irregular holes near the top crust. Those large holes aren't the same as an open crumb — they're gas pockets that migrated upward as the weakened structure collapsed around them.
The flavor tends toward excessively sour, sometimes with a boozy or acetone-like note. The crust color may be paler than expected because the yeast consumed most of the available sugars during the extended fermentation.
How to tell if your sourdough is underproofed
Underproofed sourdough has its own distinct set of symptoms, and they're almost the mirror image of overproofing.
Before baking
The dough feels dense and springy — almost bouncy. The poke test shows the indent snapping back immediately and completely, as if the dough is pushing your finger out. The dough may look like it barely increased in volume from when you shaped it. If you're using a clear container for bulk fermentation, you might notice the dough hasn't risen the expected 50-75% in volume.
During and after baking
Underproofed dough often gets dramatic, uncontrolled oven spring. The score line rips open violently, sometimes tearing on the sides or bottom where you didn't score (this is called a blowout or "ear explosion"). The crust can crack in unexpected places. Inside, the crumb is tight and heavy — small, uniform holes with thick cell walls, or in severe cases, a nearly solid, doughy center. There may be a visible line or band of dense, slightly translucent dough running through the middle of the loaf.
The flavor is often bland or "wheaty" without much complexity, because the bacteria haven't had enough time to develop the organic acids that give sourdough its characteristic tang.
Side-by-side comparison: overproofed vs underproofed sourdough
Characteristic | Underproofed | Properly proofed | Overproofed |
|---|---|---|---|
Poke test | Springs back immediately | Springs back slowly over 2-3 seconds | Indent stays, doesn't bounce back |
Dough shape | Tight, barely expanded | Noticeably expanded, holds shape | Flat, spread out, slack |
Oven spring | Explosive, uncontrolled | Steady, controlled lift | Minimal to none |
Score behavior | Tears open violently, blowouts | Opens cleanly with a defined ear | Barely opens, looks deflated |
Crumb structure | Tight, dense, thick cell walls | Open, even holes, thin cell walls | Dense bottom, large irregular holes near crust |
Flavor | Bland, flat, wheaty | Mildly tangy, complex | Excessively sour, vinegary, or boozy |
Crust color | Dark (excess sugars remain) | Deep golden brown | Pale (sugars consumed) |
Why temperature matters more than time
Most proofing problems trace back to one variable: temperature. A sourdough recipe that says "proof for 3-4 hours" is only accurate at the temperature the recipe author's kitchen happened to be. At 21°C (70°F), bulk fermentation might take 5-6 hours. At 28°C (82°F), that same dough can be fully fermented in 2.5-3 hours. That's nearly double the speed for a 7°C difference.
This is why so many bakers — especially home bakers without climate-controlled proofing boxes — run into proofing errors seasonally. A schedule that works perfectly in January can overproof your dough in July. The fix isn't to memorize times. It's to watch the dough and use the poke test, the volume increase, and the jiggle test (gently shake the banneton — properly proofed dough jiggles like set Jell-O, not like water).
If you want more control, cold retarding is the most forgiving technique available. After shaping, place your dough in the refrigerator at 3-5°C (38-41°F). Fermentation slows to a crawl, giving you a window of 8-16 hours before the dough overproofs. This is why many bakers shape in the evening and bake first thing in the morning — the fridge buys time and also develops more complex flavor through extended acid production at low temperatures.
Proofing challenges specific to gluten-free sourdough
If you're baking gluten-free sourdough, proofing becomes even trickier. Without gluten, there's no elastic protein network to trap and hold gas. Instead, you're relying on binders like psyllium husk or xanthan gum to create a gel-like matrix that holds CO2. That matrix is less forgiving than gluten — it can't stretch as far before breaking, which means the window between underproofed and overproofed is narrower.
A baker named Rosa, who runs a gluten-free home bakery in Portland, describes the difference this way: "With wheat sourdough, I had maybe a 90-minute window where the dough was in the right zone. With my rice flour blend, that window shrank to about 30-45 minutes. If I walk away and forget, it's over."
For gluten-free sourdough specifically, psyllium husk tends to provide a more extensible structure than xanthan gum, which can make the dough feel tight and resist expansion. Many gluten-free sourdough formulas use psyllium at around 5-8g per 100g of flour blend. If your gluten-free loaf consistently shows signs of poor rise, the binder ratio is the first thing to examine — but proofing time is a close second.
The gummy center problem that plagues gluten-free bread is also often misdiagnosed as a baking issue when it's actually an underproofing issue. If the crumb didn't have enough gas to create structure before hitting the oven heat, the starches gelatinize into a dense, sticky mass rather than setting around air pockets.
How flour type affects proofing speed
Not all flours ferment at the same rate. Whole grain flours — whether wheat, rye, or gluten-free grains like buckwheat flour or brown rice flour — contain more natural enzymes (amylases) and more food for bacteria. This means doughs with a high percentage of whole grain flour ferment faster and have a shorter proofing window.
White bread flour, by contrast, ferments more slowly because the bran and germ (where most of the enzyme activity lives) have been removed. If you swap from a white flour formula to a whole grain one and keep the same proofing schedule, you'll likely overproof.
Rye flour is particularly aggressive. Even a 20% addition of whole rye to a wheat dough can cut your proofing time noticeably. This is one reason traditional rye sourdoughs are often baked in loaf pans — the dough is so slack and fast-fermenting that it can't hold a freeform shape for long.
If you're working with low carb flour alternatives like almond flour or coconut flour, proofing behaves differently again. These flours have very little starch for the yeast to feed on, which means fermentation is slower and less vigorous. Sourdough made primarily with nut flours may never achieve the same volume as a wheat or rice flour sourdough, and the proofing signs are subtler.
6 fixes for common proofing mistakes
Here are specific, actionable adjustments based on what you're seeing in your loaves.
1. Your loaf is consistently underproofed
Extend your proof time in 30-minute increments. Don't double the time all at once — you'll overshoot. If you're proofing at room temperature and your kitchen is below 21°C (70°F), consider finding a warmer spot: on top of the refrigerator, inside the oven with just the light on (which typically raises the interior to about 26-28°C / 79-82°F), or near a radiator.
2. Your loaf is consistently overproofed
Reduce proof time or reduce the temperature. Cold retarding is the easiest fix — shape the dough and put it straight into the fridge. You can also reduce the amount of starter in your formula. Dropping from 20% starter to 15% (relative to flour weight) slows fermentation and gives you more time.
3. You get blowouts along the sides or bottom
This is almost always underproofing. The interior gas pressure is too high relative to the crust's ability to contain it, so the dough finds weak points and bursts through. Proof longer, and make sure your scoring is deep enough (about 1 cm / 0.5 inches) to give the gas a controlled exit path.
4. Your crumb is tight on the bottom and open on top
This uneven crumb can indicate either slight overproofing (gas migrating upward as structure weakens) or uneven shaping (not enough surface tension on the bottom). If the poke test suggested the dough was ready, focus on tighter shaping. If the dough felt slack, you likely overproofed.
5. Your cold-proofed dough overproofs overnight
Your fridge may be warmer than you think. Many home refrigerators run at 5-7°C (41-45°F) rather than the ideal 3-4°C (37-39°F). Use a thermometer to check. Alternatively, put the dough in the fridge earlier — right after shaping, before it has much room-temperature proofing time.
6. You can't tell the difference and keep guessing wrong
Start logging. Write down the time you mix, the time you shape, the time you put the dough in the fridge or oven, and your kitchen temperature. After 4-5 bakes with notes, patterns emerge. The baker who tracks data always improves faster than the one who guesses.
Rethinking the poke test
The poke test is the most commonly recommended proofing check, and it works — but it has a meaningful limitation that rarely gets discussed. The test only tells you about the surface of the dough. If your dough has a dry skin (common in low-humidity environments or after long cold retards without a cover), the surface will feel firmer than the interior. You'll think the dough is underproofed when the inside is actually ready or even slightly past peak.
This is why experienced bakers often prefer the jiggle test for cold-retarded doughs. Give the banneton a gentle side-to-side shake. If the entire mass of dough wobbles uniformly — like a water balloon in slow motion — it's well-proofed. If it barely moves, it needs more time. If it sloshes loosely and looks like it might collapse, it's overproofed. The jiggle test reads the interior structure, not just the surface, which makes it more reliable for doughs that have been in the fridge for 10+ hours.
When proofing problems are actually mixing problems
Sometimes what looks like a proofing error is actually a gluten development issue that happened earlier. If you undermix your dough — not enough kneading, stretch-and-folds, or autolyse time — the gluten network is weak from the start. A weak network can't hold gas well regardless of proofing time, and the resulting loaf can look like an overproofed one: flat, dense, poor oven spring.
The telltale difference is the windowpane test before shaping. If you can stretch a small piece of dough thin enough to see light through it without it tearing, your gluten development is adequate. If it tears immediately, you need more mixing or folding, not more proofing time.
For gluten-free bakers, the equivalent check is whether your binder has fully hydrated. Psyllium husk, for example, needs about 10-15 minutes to fully absorb water and form its gel. If you shape too quickly after mixing, the binder hasn't set up, and the dough won't hold gas during proofing regardless of timing. This is a common source of the dry, crumbly texture that gluten-free bakers struggle with — the structure never formed properly in the first place.
Frequently asked questions
Can you fix overproofed sourdough dough before baking?
Sometimes. If the dough is only mildly overproofed, you can gently reshape it and give it a short second proof of 30-60 minutes. This won't fully restore the gluten structure, but it can recover enough tension for a decent bake. If the dough is severely overproofed — completely flat, very sticky, strong vinegar smell — reshaping won't help much. At that point, you can repurpose the dough as focaccia or flatbread, where a flat profile and open, irregular crumb are actually desirable.
How long should sourdough proof at room temperature?
There's no universal answer because it depends on your starter's strength, the flour you're using, the hydration level, and your kitchen temperature. As a rough starting point, bulk fermentation at 24°C (75°F) typically takes 4-6 hours, and final proof takes 2-4 hours. But these numbers can shift dramatically. A kitchen at 30°C (86°F) might cut those times in half. Always watch the dough, not the clock.
Is it better to slightly underproof or slightly overproof sourdough?
Slightly underproofed is generally more forgiving. An underproofed loaf will have a tighter crumb and less flavor complexity, but the structure will still be intact and the bread will be edible and pleasant. A slightly overproofed loaf risks a gummy interior and structural collapse that can't be fixed in the oven. If you're unsure, err on the side of less proofing time — you can always proof a bit longer next time.
Does the type of flour change how fast sourdough proofs?
Yes, significantly. Whole grain flours ferment faster than white flours because they contain more enzymes and nutrients for the bacteria and yeast. Rye flour is especially fast-fermenting. If you switch from bread flour to a whole wheat or whole grain blend, reduce your expected proofing time by 20-30% as a starting point and adjust from there. Gluten-free flour blends based on brown rice flour or starch-heavy mixes also behave differently — they tend to ferment more slowly but have a narrower window before overproofing.
Why does my sourdough have large holes near the crust but a dense bottom?
This pattern — sometimes called "fool's crumb" — usually indicates overproofing or insufficient shaping tension. As the gluten weakens during overproofing, gas bubbles migrate upward because CO2 is lighter than the surrounding dough. The bottom, which has less gas, bakes into a dense, sometimes gummy layer. Tighter shaping and slightly shorter proofing time typically fix this. If you're seeing it consistently, try reducing your final proof by 30-45 minutes and see if the crumb evens out.

Written by
Co-founder, BakingSubs
Co-founder of BakingSubs, where he turns the science of ingredient substitutions into tested, reliable guidance for home bakers.
Related Posts
Collagen Powder in Baking as Flour Supplement: Why It Mostly Fails (and 3 Ways to Make It Work)
Lupin Flour as a Low Carb Flour Substitute: 5 Things That Change (and 3 That Can Go Wrong)
Bran as Flour Supplement for High Fiber Baking: 5 Types Compared (and How Much You Can Actually Add)
Bake with Confidence
See all
Confident Gluten-Free Baker Toolkit
The science-based system that replaces gluten's seven invisible jobs so your baking turns out soft, fluffy, and foolproof — every time.

Gluten-Free Recipe Vault
Instant access to our complete library of proven gluten-free recipes — no waiting, no guesswork, just results that work tonight.

Fix Your Gluten-Free Bread
Learn the 3-step formula to make bread rise and stay soft, discover why your loaves collapse, and get a tested sandwich bread recipe that actually works.