We've all been there, right? You follow a gluten-free bread recipe to the letter, only to end up with something that's gummy, dense, or just plain doesn't rise. It can be super frustrating! But don't toss that loaf just yet. We've spent years figuring out the common pitfalls in gluten-free bread making, and we're here to share our best gluten-free bread troubleshooting tips to help you get that perfect loaf. Let's dive into what might be going wrong and how we can fix it.
Key Takeaways
- Gummy bread often means it just needs more time in the oven, or the flour blend might be too starchy. Dense loaves can be a hydration issue – maybe the dough needed more liquid.
- A collapsed loaf could be from over-proofing, too much liquid, or not enough structure from the flour blend.
- If your bread didn't rise, double-check your yeast's expiration date, the water temperature used to proof it, and ensure you're using a flour blend compatible with yeast.
- Sourness in non-sourdough bread usually means the dough sat too long and the yeast over-fermented.
- Environmental factors like humidity and temperature can impact your dough, so be prepared to adjust liquid or proofing times accordingly.
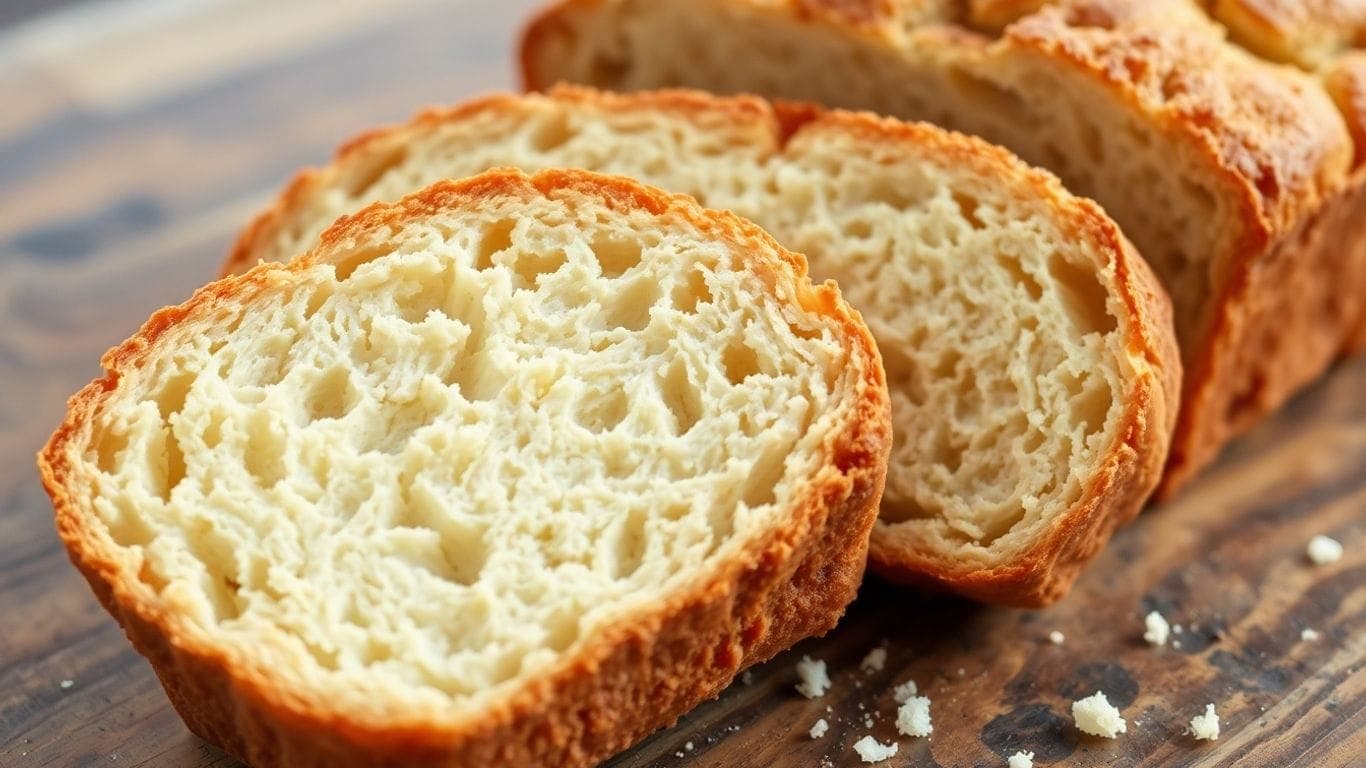
1. Why Is My Gluten-Free Bread Gummy?
Oh, the dreaded gummy gluten-free bread! We’ve all been there, right? You pull a loaf out of the oven, let it cool (or maybe you can't wait and cut into it too soon!), and then... disappointment. That sticky, doughy texture in the middle is a real bummer.
So, what's the deal? Usually, it comes down to a few key things:
- It just didn't bake long enough. This is probably the most common culprit. Gluten-free bread needs a significantly longer bake time than traditional wheat bread. It might look golden brown on the outside, but the inside can still be undercooked. We're talking potentially an extra 30-45 minutes or even more, depending on your loaf size and oven.
- Too much liquid. Sometimes, our recipes can have a bit too much moisture. Different gluten-free flours absorb water differently, so what works for one blend might make another too wet. If the dough feels excessively soupy, it might bake up gummy.
- The flour blend itself. Some blends are just starchier than others. While starches can contribute to a lighter crumb, too much can sometimes lead to that gummy texture if not balanced correctly with other flours and binders.
The biggest takeaway here is that gluten-free bread often needs more time in the oven than you might expect. Don't be afraid to let it bake until it's thoroughly cooked through. A good way to check is to use an instant-read thermometer; the internal temperature should be around 200-210°F (93-99°C).
2. Why Did My Gluten-Free Bread Collapse?
Oh, the dreaded bread collapse! We've all been there, pulling a beautiful loaf out of the oven only to watch it sink sadly in the middle. It's super frustrating, but usually, there are a couple of common culprits.
One big reason is over-proofing. This means we let the dough rise for too long. Gluten-free dough doesn't have the same structure as wheat dough, so it can only hold its shape for so long. When it rises too much, it gets weak and can't support itself anymore, leading to that sunken middle.
Another common issue is having too much liquid in the dough. While gluten-free breads often need more moisture than traditional breads, there's a fine line. If the dough is too wet, it's just too heavy to hold its shape during baking. It's like trying to build a sandcastle with really soupy sand – it just won't stand up!
Here are a few things to check if your loaf deflates:
- Did you let it rise too long? Keep an eye on the dough and try to shape and bake it when it looks nicely risen but not overly puffy.
- Is your dough too wet? Sometimes, just a tablespoon or two less liquid can make a big difference. You can also try adding a bit more flour blend, a little at a time, until it feels right.
- Was the oven temperature correct? If the oven isn't hot enough when the bread goes in, it might not get that initial oven spring it needs to set its structure properly.
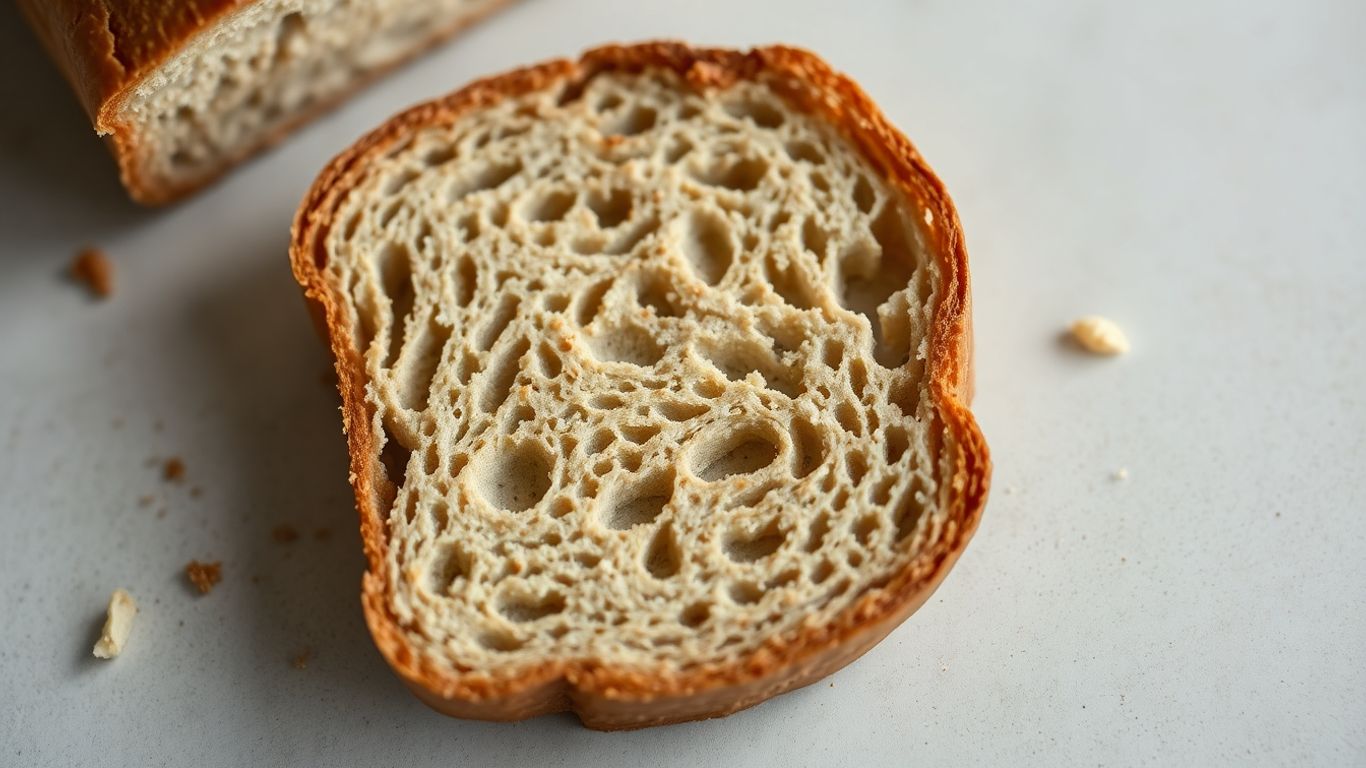
3. Why Is My Gluten-Free Bread Dense?
We've all been there – you pull a loaf of gluten-free bread out of the oven, and instead of a light, airy delight, you're met with a brick. It's super disappointing when your bread comes out dense. So, what's the deal?
Often, a dense loaf comes down to a few key things:
- Not enough liquid: Gluten-free flours can be thirsty! They don't absorb water the same way wheat flour does, and sometimes we just don't add enough. This can make the dough too stiff, leading to a heavy crumb. If your flour blend is coarser, it might need even more liquid than a finer blend. It's a good idea to pay attention to how your dough looks and feels. It should be moist, maybe a bit sticky, but not soupy.
- The wrong flour blend: Some gluten-free flours are starchier than others. While starches can help with lightness, too much can sometimes lead to a dense result if not balanced correctly. A good blend usually has a mix of whole grains, starches, and a binder.
- Over-handling or incorrect shaping: Unlike wheat bread, gluten-free dough doesn't have the same structure. If you try to knead or shape it too much, especially if it uses xanthan gum, you can break down the structure that's trying to form. This can result in a dense loaf. With gluten-free bread, you often get just one good rise, so getting the shaping right before that rise is important.
- Baking pan size: Believe it or not, the pan matters! If your pan is too big, the dough can spread out instead of rising up, making it flat and dense. Too small, and the bread won't have enough support to rise properly. Look for a pan with tall sides for the best results.
The most common culprit is usually a hydration issue or an unbalanced flour blend. Don't get discouraged; it just means we need to tweak the recipe a bit next time!
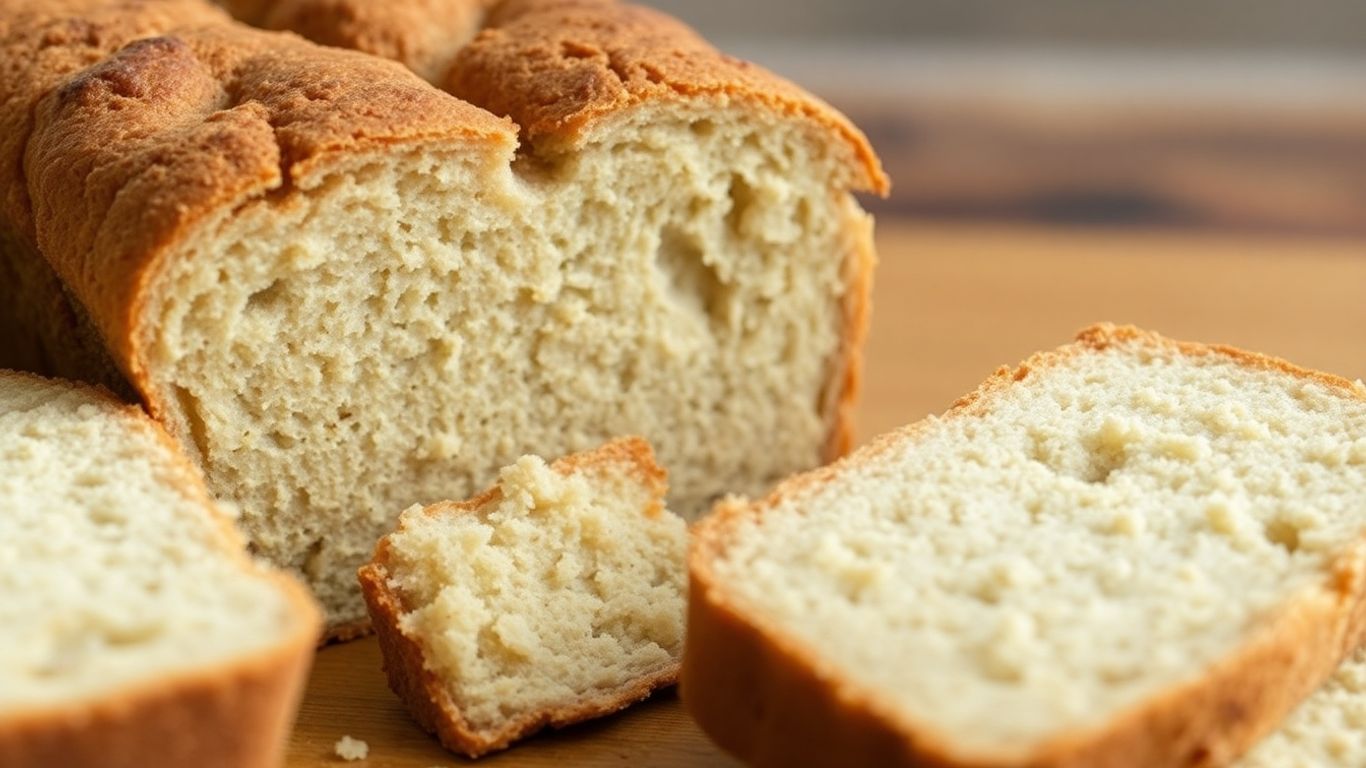
4. Why Is My Gluten-Free Bread Dry And Crumbly?
Oh, the dreaded dry and crumbly gluten-free loaf! We've all been there, right? You pull it out of the oven, let it cool (or maybe you can't wait!), slice into it, and it just... falls apart. It's like edible sand. So frustrating!
Usually, this happens because gluten-free flours just don't have that natural 'glue' that wheat flour does. Without gluten, the structure just isn't as strong, and it can lead to a dry, crumbly texture if we're not careful. But don't despair, we can fix this!
Here are a few common culprits and how we can tackle them:
- Not enough moisture or fat: Gluten-free flours can be thirsty! Sometimes, we just need a bit more liquid or some healthy fats (like oil or butter) in the recipe to keep things tender and moist. Check your recipe – does it have enough? Maybe try adding an extra tablespoon or two of liquid next time.
- The wrong flour blend: Some gluten-free flours are super absorbent (looking at you, coconut flour!). If your blend has too much of these, it can suck all the moisture out of the dough. Aim for a blend that has a good mix of different flours and starches. A good protein flour is also super important for structure in gluten-free baking.
- Over-baking: Yep, this is a big one. Gluten-free bread often needs to bake a little longer than regular bread, but if you go too far, it'll dry out. Using an instant-read thermometer is your best friend here – aim for an internal temperature of around 205-210°F (96-99°C). Don't just rely on the color!
- Cutting it too soon: I know, I know, the smell is torture! But slicing into a gluten-free loaf while it's still piping hot can make it seem way more crumbly than it actually is. Let it cool completely on a wire rack. Patience, grasshopper!
5. Why Didn't My Gluten-Free Bread Rise?
Oh, the dreaded flat loaf! We've all been there. When our gluten-free bread decides not to puff up like we hoped, it can be super disappointing. But don't worry, there are usually a few common culprits.
First off, let's talk about the yeast itself. Is your yeast alive and kicking? Just like any living thing, yeast has a shelf life. If it's past its prime, it just won't do its job of making our bread airy. Always check the expiration date, and if you're unsure, you can always do a quick test: mix a little yeast with warm water (around 105-115°F, not too hot!) and a pinch of sugar. If it gets foamy after about 5-10 minutes, it's good to go. If not, it's time for a new packet.
Beyond the yeast, the environment plays a big role. Gluten-free dough needs a warm, cozy spot to rise. If your kitchen is on the chilly side, the yeast will be sluggish. Try finding a warm place, like a slightly warmed (then turned off!) oven, or even on top of your fridge. Just make sure to cover the dough so it doesn't dry out.
Another thing to consider is the hydration of your dough. Gluten-free flours can be thirsty! If your dough seems too stiff or dry, it might not have enough moisture for the yeast to work its magic and for the structure to develop properly. Sometimes, a little extra liquid can make all the difference.
Finally, remember that gluten-free dough often behaves differently than traditional wheat dough. You usually only get one good rise, so it's important to get the shaping done before that main rise happens. Trying to shape it after it's already puffed up can deflate all that hard work.
6. Why Does Gluten-Free Bread Taste Sour?
Okay, so you've baked a loaf of gluten-free bread, and it's got this unexpected sour tang. If you weren't aiming for a sourdough flavor, this can be a bit of a head-scratcher.
The most likely culprit is that the dough sat around for too long. When yeast is left to its own devices for an extended period, it can over-ferment. This process creates lactic acid, which gives that distinct sour taste. It's kind of like leaving milk out on the counter for too long – not ideal!
Here are a few things that might lead to this:
- Proofing Time: You might have let the dough rise for longer than necessary. Gluten-free doughs can be a bit tricky, and sometimes they ferment faster than we expect, especially in a warm kitchen.
- Yeast Activity: If your yeast was super active, or if the environment was particularly warm, the fermentation process could have sped up without you realizing it.
- Recipe Balance: Sometimes, the ratio of ingredients in a recipe might unintentionally encourage faster fermentation, leading to that sour note if not managed perfectly.
If you're not going for that sourdough vibe, keep a close eye on your proofing times. It might mean shortening the rise or finding a cooler spot for your dough to develop.
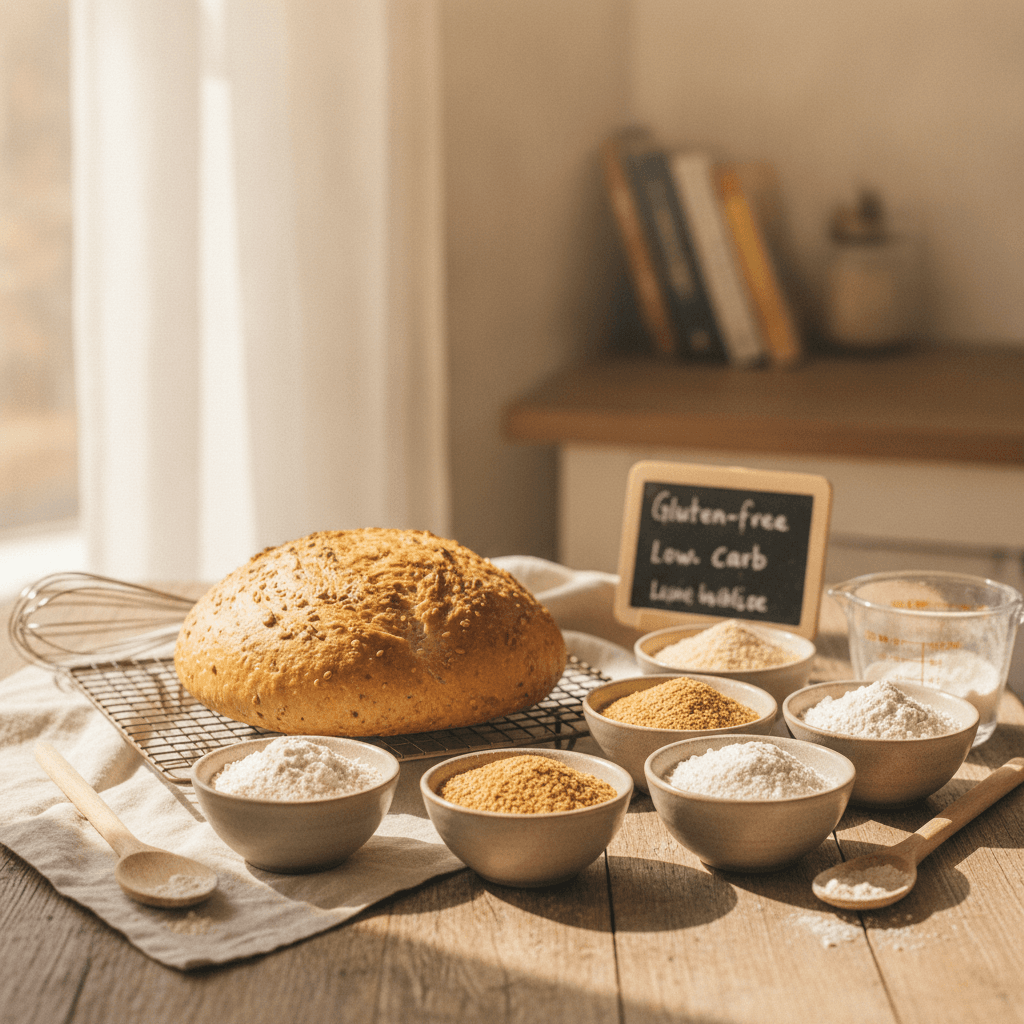
7. What Gluten-Free Flour Blends Work With Yeast?
Picking the right gluten-free flour blend is a big deal when you're trying to bake with yeast. It's not like wheat flour, which has gluten to give bread its structure and help it rise. Gluten-free flours need a little help, and not all blends are created equal when it comes to yeast baking.
Some blends are just too starchy, or they don't have the right mix of grains and starches to support yeast activity. You really need to check the packaging or the brand's website. For example, some popular all-purpose blends, like Bob's Red Mill 1:1 or King Arthur Measure for Measure, are specifically noted as not working well with yeast. It's a bummer when you find that out after you've already baked!
So, what does work? We've had good luck with a few specific blends:
- Authentic Foods Steve's Gluten-Free Bread Blend: This is a go-to for many of us for yeast breads, though it's not ideal for bread machines.
- Better Batter: Another solid choice that performs well in yeast bread recipes.
- Jules GF: We've tested this one successfully in our gluten-free sourdough.
- Namaste Gluten-Free Flour: This blend has also shown promise.
- Pillsbury Gluten-Free Flour Blend: This one is worth a try too.
We've also had success with our own DIY blends, like a homemade Gluten-Free Whole Grain Flour Blend. Making your own blend gives you a lot of control over the ingredients and how they'll interact with yeast. The key is finding a blend that has a good balance of grains and starches, and often includes a binder like psyllium husk, which really helps with structure and hydration.
8. Does The Weather Affect Gluten-Free Baking?
You know, we often forget about the little things that can throw our baking for a loop, and the weather is definitely one of them. It might seem minor, but humidity and temperature can actually mess with how our gluten-free doughs behave.
Think about it:
- High Humidity: When it's super humid, the air is already full of moisture. This means your dough might absorb less liquid from the recipe than it normally would. It can end up feeling a bit stiffer, and you might be tempted to add more liquid, which could throw off the balance. This is probably the most common weather-related issue we face.
- Low Humidity: On the flip side, dry air can make your dough dry out faster. It might feel sticky at first, but then it can start to form a crust before it's even baked, leading to a denser loaf.
- Temperature Fluctuations: If your kitchen is warmer than usual, your yeast might get a bit too excited and rise too quickly, potentially leading to a collapse later. Colder temperatures can slow down the yeast, making your rise take much longer than expected.
So, what can we do about it? It's not about stopping the weather, but about working with it. We've found that paying attention to how the dough feels rather than strictly sticking to measurements can help. If it feels too wet for the conditions, maybe let it rest a bit longer or add a tiny bit more flour. If it feels too dry, a splash more water might be needed. It's all about adapting on the fly!
9. How To Adjust Dough Hydration
Okay, let's talk about hydration. This is a big one in gluten-free baking, and honestly, it can be a bit of a guessing game at first. Unlike regular wheat doughs, gluten-free doughs often have a much wetter consistency. Think more like a thick brownie batter than a stiff dough you can really knead.
The key is to watch your dough, not just the recipe. Different flour blends soak up liquid differently. A finer flour might need more water, while a coarser one might need less. It’s always a good idea to start with a little less liquid than the recipe calls for – maybe about 20-25% less. Then, you can add more, a tablespoon at a time, until you get that perfect consistency. You're looking for a dough that's sticky but manageable.
Here’s a quick rundown of what to look for:
- Too wet: If your dough is super soupy and won't hold any shape, you've likely added too much liquid. Try adding a bit more of your flour blend, a tablespoon at a time, until it firms up a little.
- Too dry: If the dough seems stiff, crumbly, and isn't coming together, it needs more liquid. Add water slowly, a tablespoon at a time, mixing well after each addition until it's smooth and cohesive.
- Just right: The dough should be sticky, maybe even a little shaggy, but it should hold together and have a soft, pliable feel. It won't be smooth and elastic like wheat dough, and that's perfectly okay!
10. What About Psyllium Husk?
Okay, let's talk about psyllium husk. If you've been baking gluten-free for a while, you've probably heard of it, and maybe you're even using it. It's a pretty popular binder, kind of like a gluten substitute, that helps hold our loaves together. Think of it as the glue that regular flour has naturally, but we need to add it back in for our gluten-free creations.
Psyllium husk is fantastic because it does a couple of really important things for our bread. First off, it's a real champ at holding onto water. This means it can help give our bread a wonderfully soft and moist crumb, which is something we all strive for, right? It also makes the dough much easier to handle. Seriously, it makes the dough more pliable, so kneading and shaping feel way less like wrestling a sticky blob and more like actual bread making. This is a big win, especially when compared to some other binders that can make dough a bit more challenging.
Here's why we love it:
- Binding Power: It acts as a binder, giving structure to our dough so it doesn't just fall apart. This is super important since we don't have gluten.
- Moisture Retention: It soaks up water and holds onto it, which helps keep the bread from drying out and becoming crumbly.
- Dough Handling: It makes the dough easier to knead and shape, which is a huge relief for many gluten-free bakers.
Now, a little heads-up: psyllium husk is really good at absorbing liquid. This means you might need to adjust the amount of water in your recipe depending on the type of psyllium husk you're using and how fine it is. If your dough seems too dry, you might need a splash more water. If it's too wet, you might need a bit less next time. It's all about finding that sweet spot for your specific flour blend and ingredients.
11. Is My Yeast Expired?
Okay, let's talk about yeast. It's a living thing, right? And like all living things, it has a shelf life. If your gluten-free bread isn't rising like it should, the first thing we should check is your yeast. Expired yeast is a super common culprit for flat, dense loaves.
Think of yeast as tiny little workers. They eat the sugars in your flour and then, as a byproduct, they release carbon dioxide gas. That gas is what makes your bread puff up and get all airy. But if the yeast is old and has lost its power, those little workers aren't going to do their job. They might be too weak or, sadly, they might have all passed on.
So, how do you know if your yeast is past its prime?
- Check the expiration date: This seems obvious, but we all have those jars tucked away in the back of the pantry. If it's past the date, it's probably time to toss it.
- Do a 'proofing' test: This is a great way to see if your yeast is still active before you even mix your dough. Grab a small bowl and pour in about half a cup of warm water (think bathwater temperature, not too hot, not too cold). Stir in a teaspoon of sugar and then sprinkle about a teaspoon of your yeast on top. Let it sit for about 5-10 minutes. If it gets foamy and bubbly, your yeast is good to go! If nothing happens, it's time for a new packet.
- Smell it: Fresh yeast usually has a pleasant, slightly yeasty smell. If it smells sour, musty, or just plain off, it's a sign it's gone bad.
Using fresh, active yeast is one of the simplest ways to make sure your gluten-free bread has a fighting chance at a good rise. It’s a small step, but it makes a big difference!
12. Did I Use The Right Type Of Yeast?
Okay, so we've talked about whether your yeast is even alive, but what about which yeast you used? This is a pretty common hiccup in gluten-free baking, especially since we can't just grab any old packet off the shelf.
There are generally two main types of yeast we see in recipes:
- Active Dry Yeast: This is the kind that usually needs to be “proofed” first. You know, where you mix it with warm water and a pinch of sugar and wait for it to get foamy? If your recipe calls for this, and you just dumped it straight into the dry ingredients, it might not have woken up properly. It needs that warm liquid bath to get going.
- Instant Yeast (or Rapid Rise Yeast): This one is more forgiving! You can usually mix it right in with your dry ingredients, and it'll get to work. If your recipe specified instant yeast and you tried to proof it like active dry, that's probably not the issue, but it's good to know the difference.
Using the wrong type of yeast can totally mess with your bread's rise. If you used active dry yeast when the recipe called for instant, or vice versa, your bread might be flatter than you expected. Always double-check what the recipe writer intended. It makes a bigger difference than you might think!
13. Was The Water Temperature Correct?
Okay, let's talk about water temperature for our gluten-free bread. This might seem like a small detail, but it's actually a pretty big deal for our yeast friends. If the water is too hot, we can actually kill the yeast before it even gets a chance to do its job. Think of it like giving them a really bad fever – they just can't function. On the flip side, if the water is too cold, the yeast will be sluggish. They won't wake up and get active, which means our bread won't rise like we want it to.
So, what's the sweet spot? We're generally aiming for water that feels lukewarm to the touch. A good way to check is to stick your finger in it – it should feel comfortable, not hot and not cold. If you want to be super precise, a thermometer is your best friend. Most recipes call for water between 105°F and 115°F (40°C to 46°C). This range is perfect for waking up the yeast and getting them excited to work their magic.
Here’s a quick rundown:
- Too Hot: Kills the yeast. No rise for you!
- Too Cold: Makes the yeast sleepy. Slow or no rise.
- Just Right (Lukewarm): Wakes up the yeast. Happy yeast, happy bread!
Getting this temperature right is a simple step that can make a world of difference in how well your gluten-free bread rises and turns out. It’s one of those little things that really pays off.
14. Did I Feed The Yeast Properly?
Okay, let's talk about feeding our little yeast friends. When we're baking with yeast, especially in gluten-free recipes where things can be a bit trickier, we need to make sure the yeast has what it needs to do its job. Think of it like giving a pet its food – if it doesn't get the right stuff, it won't be happy or energetic.
So, what does "feeding" the yeast actually mean in baking? It's all about giving it something to eat, which is usually a bit of sugar or honey, mixed with warm water. This step, often called "proofing" the yeast, is super important. Here's what to look out for:
- Did you add a little something sweet? Yeast needs food to wake up and get active. A teaspoon of sugar or honey in the warm water is usually enough. Without it, the yeast might just sit there, doing nothing.
- Was the water temperature just right? Too hot, and we can kill our yeast buddies. Too cold, and they'll be sluggish. Aim for lukewarm, around 105-115°F (40-46°C). If you don't have a thermometer, it should feel comfortably warm on your wrist, not hot.
- Did you give it enough time? After mixing the yeast with warm water and a bit of sugar, you should see it get foamy and bubbly within about 5-10 minutes. If nothing happens, your yeast might be old or dead, or the water was the wrong temperature. This foamy action is your sign that the yeast is alive and ready to make bread rise.
If you skipped this step or didn't do it quite right, your bread might not get that lovely lift we're looking for. It's a small step, but it makes a big difference in how well your yeast performs.
15. Did I Shape Or Rise The Dough Correctly?
Okay, let's talk about the final stages before your gluten-free bread hits the oven: shaping and rising. This is where things can go a little sideways if we're not careful, and it really impacts the final loaf.
First off, shaping. Gluten-free dough is different from wheat dough because, well, no gluten! This means we can't do those fancy stretch-and-folds that build structure in traditional bread. Instead, think of it more like gently coaxing the dough into its final form. We want to avoid overworking it. Using wet hands or a little oil can help prevent sticking when you're trying to shape it into a ball or into your loaf pan. The goal here is to create a nice, even surface without deflating all the air we've worked so hard to incorporate.
Now, for the rise, or proofing. This is super important, and it's easy to mess up with gluten-free baking. Unlike wheat bread that often doubles in size, gluten-free loaves tend to get puffy. Don't expect a dramatic rise; a noticeable increase in volume is usually a good sign. Over-proofing is a common culprit for a collapsed loaf. The structure just can't hold up the air anymore, and it deflates. This can happen surprisingly fast, especially in a warm kitchen or if your dough has a lot of starches. On the flip side, under-proofing means your bread won't have that light, airy texture we're after, leading to a dense crumb.
So, what should we be looking for?
- Gentle Handling: Treat your dough with care during shaping. No aggressive kneading or stretching.
- Visual Cues: Watch for puffiness, not necessarily doubling. If it looks like it's about to burst, it might be over-proofed.
- Proofing Environment: Keep an eye on the temperature. A warm spot is great for rising, but too warm can speed things up too much. If it's cold, your rise will be slow.
Getting the shaping and rising just right takes practice, but paying attention to these details makes a huge difference in the final outcome of your loaf.
So, We Did It!
Whew! We've tackled a bunch of those pesky gluten-free bread problems, haven't we? It can feel like a real puzzle sometimes, trying to get that perfect loaf. But remember, every baker, even the pros, has had a few flops. The key is not to give up.
We've gone over why things might go wrong, from the flour you use to how you mix it, and even the weather outside. Hopefully, this guide gives you the confidence to try again, maybe tweak a few things, and get closer to that delicious, homemade gluten-free bread you're dreaming of. Happy baking, everyone!

Written by
Co-founder, BakingSubs
Co-founder of BakingSubs, where he turns the science of ingredient substitutions into tested, reliable guidance for home bakers.
Related Posts

Bake with Confidence
See all
Confident Gluten-Free Baker Toolkit
The science-based system that replaces gluten's seven invisible jobs so your baking turns out soft, fluffy, and foolproof — every time.

Gluten-Free Recipe Vault
Instant access to our complete library of proven gluten-free recipes — no waiting, no guesswork, just results that work tonight.

Fix Your Gluten-Free Bread
Learn the 3-step formula to make bread rise and stay soft, discover why your loaves collapse, and get a tested sandwich bread recipe that actually works.