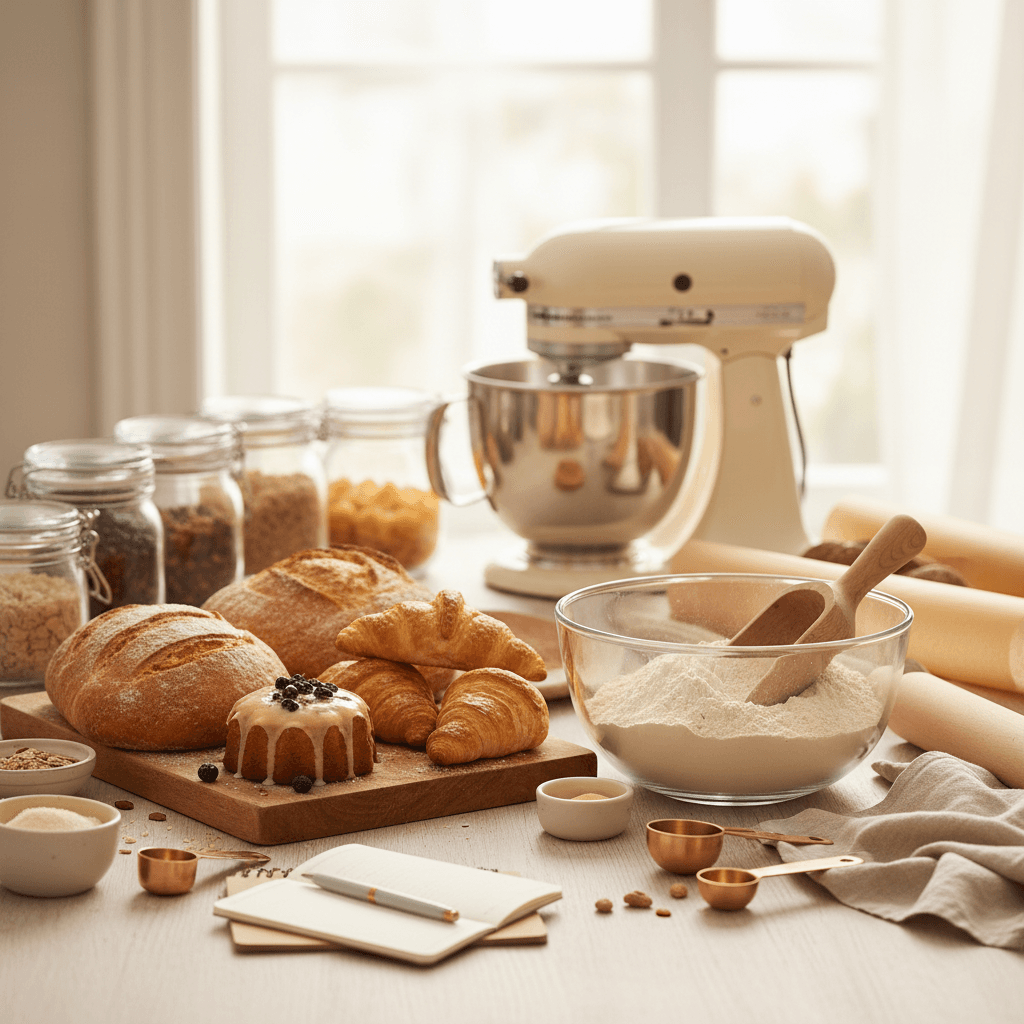
Setting up a home bakery kitchen is one of the most important steps between "I want to sell baked goods" and actually getting paid. This guide covers everything from cottage food kitchen requirements to the exact equipment you need, with real product recommendations and approximate prices so you can budget accurately.
Key takeaways
- Most cottage food laws allow you to bake from your existing home kitchen, but you may need specific upgrades like a separate handwashing station or dedicated storage.
- You can set up a fully functional home bakery kitchen for $500 to $2,000, depending on what equipment you already own.
- A digital scale, commercial-grade sheet pans, and a stand mixer are the three most impactful investments for consistent, efficient production.
- Dedicated storage and labeling systems matter more than fancy equipment when it comes to passing health inspections.
- Gluten-free home bakeries have a significant market advantage because most local bakeries don't serve this audience, and customers will pay premium prices for safe, delicious options.
- Your kitchen layout should prioritize workflow efficiency: prep, bake, cool, package — in that order.
What cottage food laws require for your kitchen
Before buying a single piece of equipment, check your state's cottage food law requirements. Most states allow you to sell baked goods from a standard residential kitchen, but the specific rules vary widely. Some states require an annual permit or registration, while others simply require that your kitchen meets basic sanitation standards.
Common requirements include a working sink with hot and cold running water, a separate handwashing station (in some states your kitchen sink counts), adequate refrigeration, and surfaces that can be easily cleaned. A few states require a home kitchen inspection before you can start selling.
The good news: most home kitchens already meet the baseline requirements. The upgrades you'll likely need are organizational — dedicated storage for bakery ingredients, proper labeling supplies, and a clear separation between your personal and business cooking areas.
Someone Just Asked Your Price — and You Froze?
Going from "I made this for you" to "that'll be $45" is a big leap. Guess too low and you're baking for free. Guess too high and you lose the order.
Most home bakers undercharge by 40–60% because they forget overhead, packaging, and their own time. The math is harder than it looks — and doing it in your head mid-text message is a recipe for resentment.
The free Home Bakery Pricing Calculator does the math for you. Plug in ingredients, batch time, and overhead — see exactly what it costs to make and what to charge for a real profit.
Get the free Home Bakery Pricing Calculator
Stop guessing your prices. Plug in ingredients, time, and overhead — see exactly what to charge.
Essential equipment for a home bakery kitchen
You don't need a commercial kitchen to produce professional results. Here's the equipment that actually matters, broken down by priority. If you want a broader look at baking gear across all budgets, our complete baking essentials guide covers everything in detail.
Must-have equipment (start here)
| Equipment | Why you need it | Approximate price |
|---|---|---|
| Stand mixer | Consistent mixing for large batches; saves time and physical strain | $250–$400 |
| Digital kitchen scale | Precision for recipe scaling and consistent results batch after batch | $15–$30 |
| Commercial half-sheet pans (set of 6) | Even baking, durable enough for daily production | $30–$50 |
| Oven thermometer | Home ovens are often off by 25+ degrees; this ensures accuracy | $7–$12 |
| Cooling racks (set of 3) | Proper cooling prevents soggy bottoms and speeds up packaging | $15–$25 |
| Measuring cups and spoons (stainless steel) | Backup for quick measurements; easy to sanitize | $10–$15 |
| Food-safe storage containers | Ingredient organization and freshness; required for inspections | $30–$60 |
The KitchenAid Artisan 5-Quart Stand Mixer (around $350) is the workhorse most home bakers start with. It handles cookie doughs, cake batters, and bread doughs without breaking a sweat. If you're planning to scale up quickly, the 6-quart Professional model ($400–$450) gives you more capacity per batch.
For your scale, we use the OXO Good Grips 11lb Food Scale (about $25) and it's been rock solid for years. Weighing ingredients instead of using volume measurements is the single biggest upgrade you can make for consistency — and consistency is what turns one-time buyers into repeat customers.
For a deeper comparison of where to save and where to invest, check out our budget vs premium baking equipment comparison.
Nice-to-have upgrades (add as you grow)
| Equipment | Why it helps | Approximate price |
|---|---|---|
| Second oven or countertop convection oven | Doubles your baking capacity during busy periods | $150–$500 |
| Silicone baking mats (set of 4) | Eliminates parchment paper costs; even heat distribution | $15–$25 |
| Bench scraper | Essential for bread work and cleanup | $5–$10 |
| Piping tips and bags | Professional finishing for decorated items | $15–$40 |
| Label printer | Professional-looking labels for cottage food compliance | $60–$150 |
| Food processor | Grinding nuts, making pie dough, processing ingredients quickly | $100–$200 |
A DYMO LabelWriter 450 (around $80) pays for itself fast. Most cottage food laws require labels with your business name, ingredients list, allergen warnings, and a "Made in a home kitchen" disclaimer. Hand-writing labels works at first, but it gets old fast when you're filling 30 orders a week.
If you're looking at the full picture of professional-grade upgrades, our guide to professional baking equipment worth investing in breaks down which upgrades actually change your results.
Interested in building your baking knowledge alongside your business? The free Home Bakery Pro masterclass covers how to get consistent orders and build a sustainable home bakery. Check it out here — it was created by a baker who replaced her full-time salary with home bakery income.
How to design your home bakery kitchen layout for efficiency
The best home bakery layout follows the natural flow of production: prep, bake, cool, package. You don't need a huge kitchen — you need a smart one.
Start by mapping out four zones in your existing kitchen:
- Prep zone: This is where you measure, mix, and shape. You need clear counter space (at least 3-4 feet), your scale, mixer, and easy access to ingredients. Keep your most-used flours and sugars in labeled, airtight containers within arm's reach.
- Bake zone: Your oven area. Keep sheet pans, baking mats, and oven mitts stored right next to the oven. An oven thermometer is non-negotiable — home ovens drift, and a 25-degree difference can ruin an entire batch.
- Cooling zone: You need space for cooling racks where items can sit undisturbed for 30-60 minutes. A portable wire shelving unit ($30-$50) can create vertical cooling space without eating up counter real estate.
- Packaging zone: Boxes, bags, labels, twist ties, and your label printer all live here. This zone should be away from the oven to avoid heat affecting packaging materials.
If your kitchen is small, consider a stainless steel kitchen cart on wheels (around $80-$120). It gives you an extra prep surface during production and rolls out of the way when you're done.
Storage and organization that passes inspection
Proper storage isn't just about being tidy — it's often a legal requirement. Health inspectors (in states that require inspections) look for ingredients stored off the floor, clearly labeled, and separated from household chemicals and pet food.
Here's what works:
- Clear, airtight containers for all dry ingredients. Label them with the ingredient name and date opened. OXO POP containers ($30-$70 for a set) are popular because they stack well and seal tightly.
- A dedicated shelf or cabinet for bakery-only ingredients. Even if your state doesn't explicitly require this, it prevents cross-contamination and keeps you organized during high-volume production days.
- Wire shelving unit in a pantry or closet for overflow supplies — packaging materials, extra flour bags, and bulk ingredients.
- A binder or digital folder with your recipes, batch records, and ingredient sourcing information. Some states require this for traceability.
If you're baking gluten-free, dedicated storage is even more critical. For a thorough guide to building out your ingredient supply, see our post on how to stock a baking pantry on a budget.
Why gluten-free home bakeries have a market advantage
If you're considering specializing in gluten-free baking, you're looking at one of the most underserved markets in local food. Most traditional bakeries don't offer gluten-free options, and the ones that do often treat it as an afterthought — a single sad muffin on the bottom shelf.
Here's what makes this niche so powerful:
- Less competition: In most local markets, there are zero dedicated gluten-free home bakeries. You're not competing with 15 other cookie bakers — you're often the only option.
- Premium pricing: Gluten-free customers are accustomed to paying more. A dozen gluten-free cookies that cost you $6 to make can easily sell for $18-$24, and customers won't blink.
- Extreme loyalty: When someone with celiac disease or gluten sensitivity finds a baker they trust, they become a customer for life. They'll order weekly, refer their friends, and leave glowing reviews.
- Built-in word of mouth: The gluten-free community is tight-knit. Local celiac support groups, Facebook groups, and online forums are active places where people share recommendations constantly.
The key is building trust through knowledge. Understanding gluten-free baking fundamentals — why textures differ, how to prevent cross-contamination, and which flour blends work for which applications — sets you apart from someone who just swaps in a box mix.
If you go this route, having a completely gluten-free kitchen is a massive selling point. Customers will pay even more knowing there's zero risk of cross-contamination. Our best gluten-free baking essentials at every budget guide can help you stock up on the right ingredients.
Sample home bakery kitchen setup budget
Here's what a realistic startup budget looks like, assuming you already have a basic home kitchen with a working oven and refrigerator.
| Category | Budget setup | Mid-range setup | Premium setup |
|---|---|---|---|
| Stand mixer | $250 (KitchenAid Classic) | $350 (KitchenAid Artisan) | $450 (KitchenAid Professional) |
| Baking pans and sheets | $40 | $70 | $120 |
| Scale and measuring tools | $20 | $30 | $50 |
| Storage containers | $30 | $60 | $100 |
| Cooling and prep tools | $25 | $50 | $80 |
| Packaging supplies (initial stock) | $40 | $75 | $120 |
| Label printer and labels | $0 (handwritten) | $80 | $150 |
| Permits and registration | $25–$75 | $25–$75 | $25–$75 |
| Total | $430–$480 | $740–$790 | $1,095–$1,145 |
The budget setup gets you producing and selling. The mid-range setup adds efficiency and professional presentation. The premium setup is for bakers who are committed from day one and want to minimize upgrades later.
Our complete baking equipment buying guide goes deeper into each price tier if you want to compare specific products side by side.
Packaging and labeling basics for home bakeries
Your packaging is the first thing customers see, and it communicates whether you're a professional operation or a hobby baker. You don't need custom-printed boxes from day one, but you do need clean, consistent presentation.
Start with these essentials:
- Clear cellophane bags for cookies and bars — they show off your product and keep it fresh. A pack of 200 runs about $10-$15.
- Kraft paper boxes for cupcakes, muffins, and pastries. They look professional and are food-safe. About $20-$30 for a pack of 25.
- Labels with your business name, full ingredient list, allergen information, net weight, and the required cottage food disclaimer. Your state may have a specific format.
- Twist ties, stickers, or washi tape for sealing bags — small touches that make your packaging look intentional.
As you grow, consider ordering custom stickers with your logo from a service like Sticker Mule or Avery. A roll of 250 custom stickers costs about $50-$80 and instantly elevates plain packaging.
Common mistakes when setting up a home bakery kitchen
We see these mistakes constantly, and they're all avoidable:
- Buying too much equipment upfront. Start with the essentials and add tools as your menu and order volume demand them. That $300 bread proofer can wait until you're actually selling bread.
- Ignoring workflow. A gorgeous kitchen that forces you to walk back and forth across the room for every batch wastes hours per week. Spend time optimizing your layout before your first production day.
- Skipping the oven thermometer. This $8 tool prevents more failed batches than any other piece of equipment in your kitchen.
- Not tracking batch costs. From day one, know exactly what each recipe costs to make. Include ingredients, packaging, labels, and your time. If you don't know your costs, you can't price profitably.
- Neglecting food safety documentation. Even if your state doesn't require it, keeping batch records, ingredient logs, and cleaning schedules protects you and builds trust with customers who ask questions.
Frequently asked questions
How much does it cost to set up a home bakery kitchen?
A basic home bakery kitchen setup costs between $430 and $1,150, depending on what equipment you already own and the quality level you choose. Most bakers can start producing and selling with about $500 in equipment and supplies. You'll add upgrades as your order volume grows and you identify bottlenecks in your workflow.
Do I need a separate kitchen to run a home bakery?
In most states, no. The majority of cottage food laws allow you to use your existing residential kitchen. Some states require that pets be kept out of the kitchen during production, and a few require a separate handwashing station. Check your specific state's cottage food regulations before investing in any renovations.
What is the best stand mixer for a home bakery?
The KitchenAid Artisan 5-quart stand mixer ($350) is the most popular choice for home bakeries because it handles most batch sizes well and has widely available attachments. If you're regularly making large batches of bread dough or stiff cookie dough, the KitchenAid Professional 6-quart ($400-$450) offers more power and capacity. Either will last years with proper care.
Can I run a gluten-free home bakery from a shared kitchen?
You can, but a dedicated gluten-free kitchen is a significant selling point. If you share your kitchen with gluten-containing products, you'll need strict cross-contamination protocols — separate storage, dedicated equipment, and thorough cleaning between uses. Many gluten-free customers specifically seek out bakers with fully gluten-free kitchens, so going dedicated can justify higher prices and attract more loyal customers.
What permits do I need for a home bakery?
Requirements vary by state and sometimes by county. Most states require at minimum a cottage food permit or registration, a food handler's certificate, and proper labeling on all products. Some states have annual sales caps (ranging from $25,000 to unlimited). Check your state's Department of Agriculture or Health Department website for current cottage food law details.
Ready to turn your kitchen into a business?
You've got the kitchen setup covered — now you need customers. Getting your first orders is the hardest part of starting a home bakery, and it's where most bakers get stuck.
This free masterclass from a baker who replaced her full-time salary with home bakery income shows you exactly how to get consistent repeat orders — without relying on social media.

Written by
Co-founder, BakingSubs
Co-founder of BakingSubs, where he turns the science of ingredient substitutions into tested, reliable guidance for home bakers.
Related Posts
Protein Powder as Flour Replacement in Baking: Why It Fails (and 5 Fixes That Actually Work)
Almond Flour vs Coconut Flour for Keto Baking: 5 Differences That Actually Change Your Results
Monk Fruit Sweetener for Baking: 5 Mistakes That Ruin Texture (and How to Fix Each One)
Bake with Confidence
See all
Confident Gluten-Free Baker Toolkit
The science-based system that replaces gluten's seven invisible jobs so your baking turns out soft, fluffy, and foolproof — every time.

Gluten-Free Recipe Vault
Instant access to our complete library of proven gluten-free recipes — no waiting, no guesswork, just results that work tonight.

Fix Your Gluten-Free Bread
Learn the 3-step formula to make bread rise and stay soft, discover why your loaves collapse, and get a tested sandwich bread recipe that actually works.