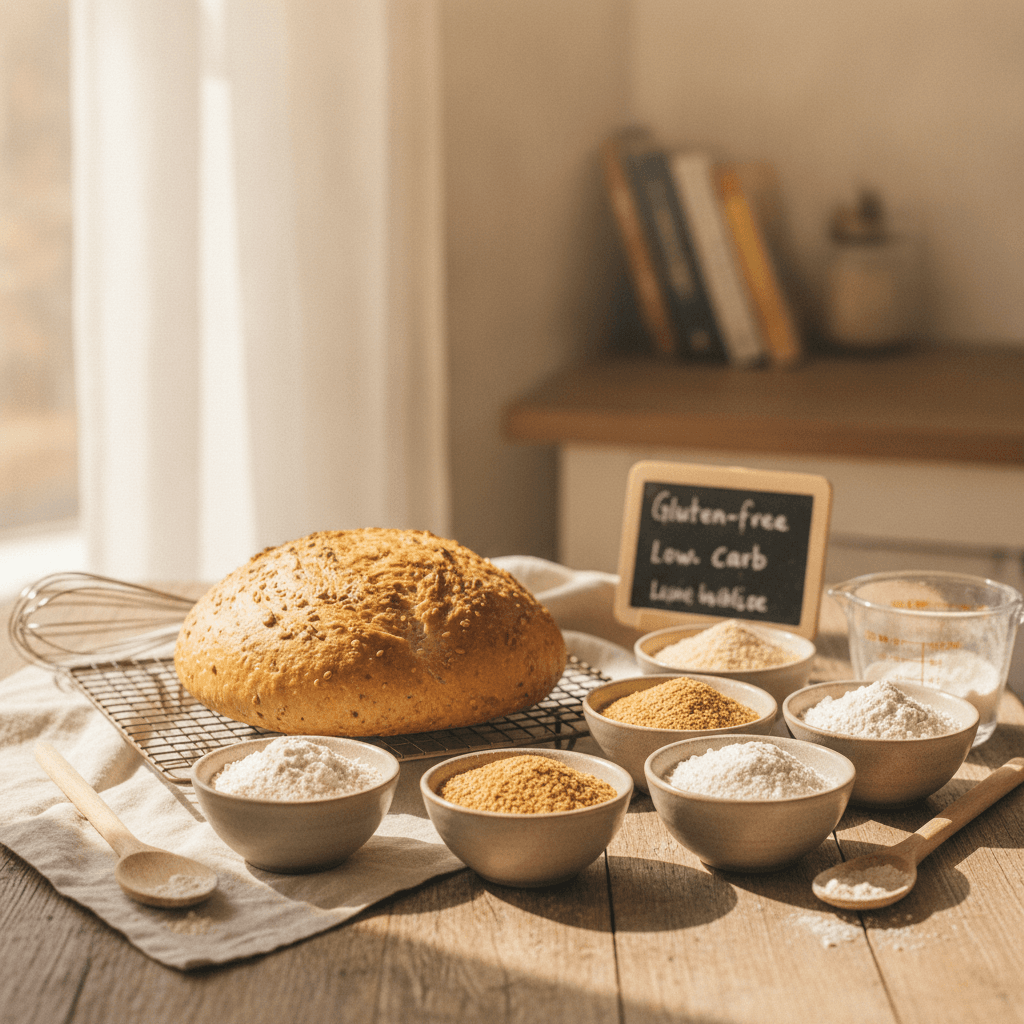
We've all been there, right? You're excited to bake some homemade bread, but when you pull it out of the oven, it's a sticky mess. It's super frustrating when your gluten free bread dough turns out too sticky, making it hard to handle and even harder to enjoy. We've run into this problem ourselves more times than we can count, and we've figured out a few things that really help. Let's get this sorted so you can bake a perfect loaf next time.
Key Takeaways
- Gluten-free dough acts differently than regular dough because it lacks gluten, which is why binders like psyllium husk powder are so important for structure.
- Getting the right balance of flours and starches, along with the correct amount of liquid, is key to avoiding a gluten free bread dough too sticky situation.
- Don't be afraid to mix your gluten-free dough thoroughly; it needs more mixing than traditional dough to develop its structure.
- Baking your gluten-free bread for a longer time, possibly at a slightly lower temperature, and using an instant-read thermometer to check for an internal temperature of 205-210°F is vital for a non-gummy interior.
- Patience is a virtue! Letting your gluten-free bread cool completely before slicing is just as important as baking it properly to prevent a sticky, gummy texture.
Understanding Your Gluten Free Bread Dough Too Sticky
Okay, so we’ve all been there. You’re trying to make some delicious gluten-free bread, and the dough feels more like a sticky mess than something you can actually shape. It’s super frustrating, right? Let’s figure out why this happens.
Why Gluten Free Dough Behaves Differently
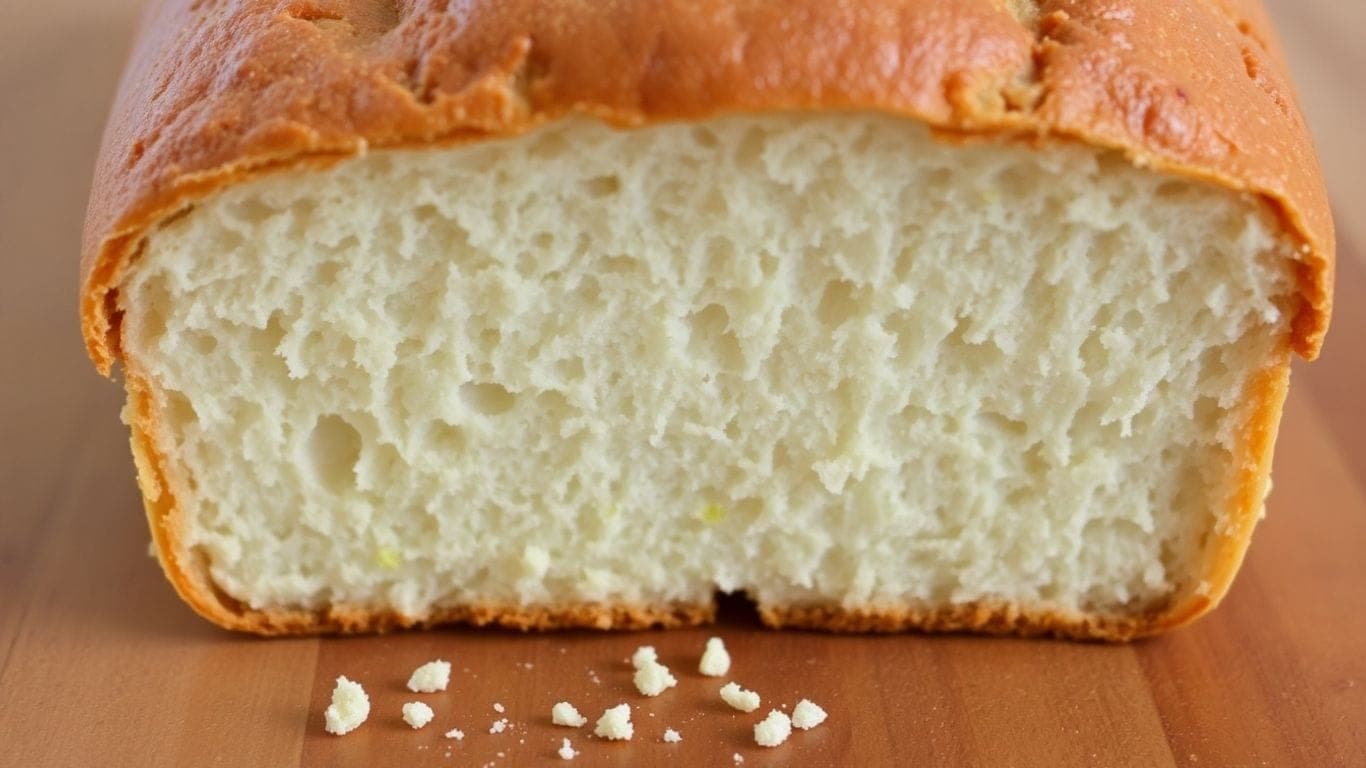
Gluten is what gives regular bread its stretchy, elastic quality. It’s like the glue that holds everything together and allows it to trap gases, making it rise and giving it that chewy texture. Without gluten, our gluten-free flours just don’t have that natural binding power. They’re more like sand – they don’t stick together on their own. This is why gluten-free dough often feels wetter and stickier than what you might be used to. It’s not necessarily a bad thing, but it definitely means we need to approach it a bit differently.
The Role of Binders in Gluten Free Baking
Since we don't have gluten, we need to add something else to help our dough hold its shape and structure. These are called binders. Think of them as the gluten-free baker's best friend. Common binders include things like xanthan gum, guar gum, and psyllium husk. They help mimic gluten's job by:
- Giving the dough structure so it doesn't just fall apart.
- Helping to trap air, which aids in rising.
- Keeping the moisture in, which is super important for a good crumb.
If your recipe doesn't have enough binder, or if you're using a flour blend that's missing one, you'll likely end up with a sticky, unmanageable dough.
Common Causes for Sticky Dough
So, what exactly makes our gluten-free dough turn into a sticky situation?
- Flour and Starch Balance: Sometimes, a recipe might have too much starch compared to the flours. Starches like tapioca or potato starch absorb a lot of liquid, and if there's too much, the dough can become overly wet and sticky.
- Hydration Levels: This is a big one. Gluten-free flours absorb liquid differently than wheat flour. If a recipe has too much liquid, or if you accidentally add a bit too much water, the dough will be much stickier. It’s a delicate balance!
- Mixing Time: Not mixing enough can leave ingredients unincorporated, leading to a sticky mess. On the flip side, over-mixing can sometimes break down the structure we’re trying to build, though this is less common with gluten-free dough.
- Ingredient Temperature: Sometimes, using ingredients that are too warm can affect how they combine, leading to a stickier dough. Room temperature is usually best for most ingredients.
Mastering The Mix: Achieving The Right Dough Consistency
Getting the dough consistency just right is a big part of making gluten-free bread that doesn't end up sticky or gummy. It's not quite like working with regular wheat dough, so we need to pay a little extra attention here.
The Importance of Flour and Starch Ratios
When we're baking without gluten, the blend of flours and starches we use really matters. Different flours absorb water differently, and getting this balance wrong is a common reason for sticky dough. If you're experimenting with new flours, it's a good idea to start with a recipe you trust and see how it behaves. Sometimes, just a small adjustment, like adding an extra tablespoon of flour or reducing the liquid slightly, can make a world of difference. We've found that weighing your ingredients, rather than just using cups, gives us the most consistent results. Gluten-free flours can be tricky to measure by volume, and a scale takes the guesswork out of it.
Hydration Levels: Finding The Perfect Balance
Hydration is basically the amount of water in our dough. Too much water and the dough will be soupy and sticky, leading to a dense, gummy loaf. Too little, and it might be dry and crumbly. We're aiming for a dough that's somewhere between a thick batter and a soft dough – it should be sticky, but manageable. Think of it like a thick cake batter that you can scoop, but it holds its shape somewhat. If your dough feels too wet, don't panic! You can often fix it by adding a little more flour, a tablespoon at a time, until it reaches that ideal consistency. Conversely, if it seems too dry, a tiny bit more liquid can help.
Effective Mixing Techniques For Gluten Free Dough
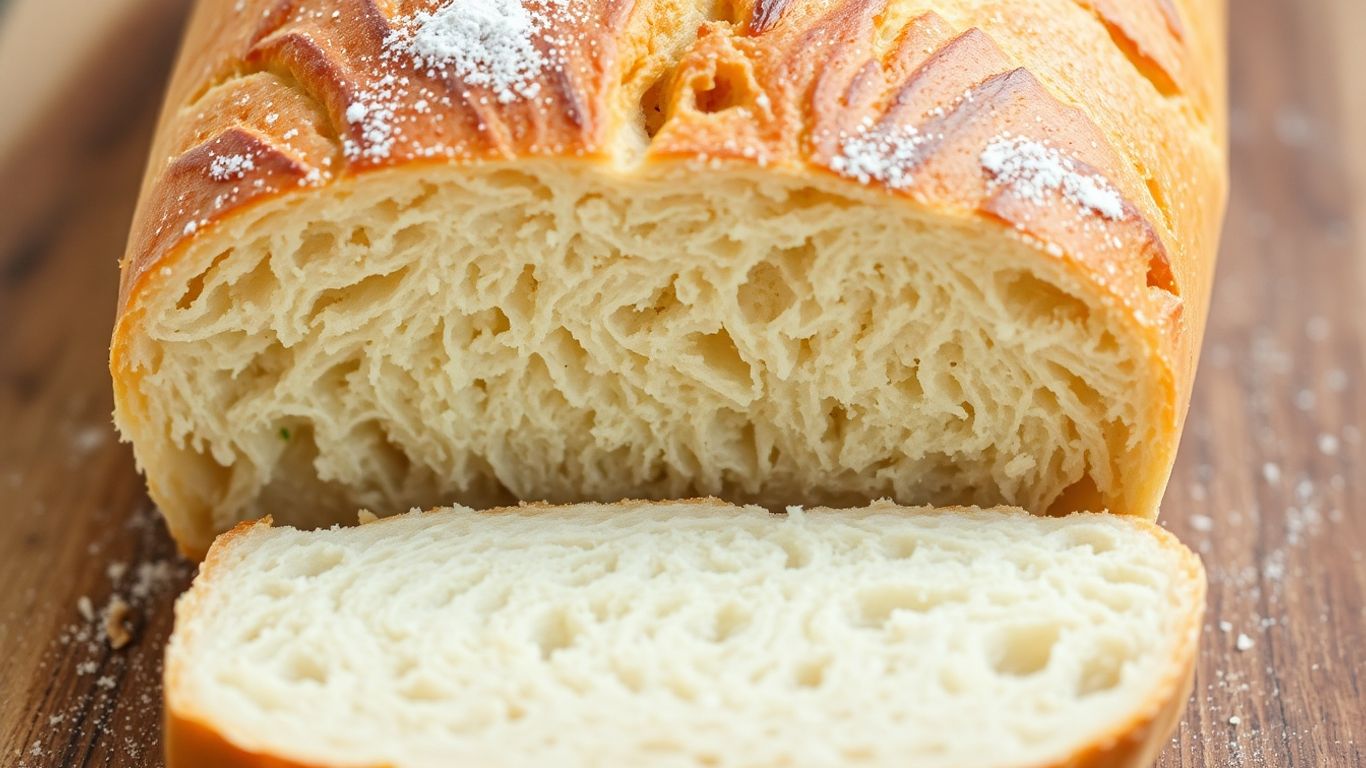
Mixing is where the magic happens, especially with gluten-free binders like psyllium husk or xanthan gum. These ingredients need time and agitation to do their job and create that structure that gluten would normally provide. We've found that mixing the dough thoroughly is key. You want to keep going until the dough starts to look smoother and less shaggy. If you're using a stand mixer, you'll notice a change in texture as the binders activate. Don't be afraid to let it mix for a few minutes longer than you might think. This thorough mixing helps to evenly distribute the binders and aerate the dough, which can lead to a better rise and a nicer crumb. A well-mixed dough is less likely to be sticky and gummy after baking.
Baking Strategies To Prevent A Gummy Interior
So, we've mixed our dough and it looks pretty good, but how do we make sure it bakes up right and doesn't end up with that frustrating gummy center? It all comes down to a few key things during the baking and cooling process.
The Crucial Role of Baking Time
This is a big one, folks. Gluten-free bread often needs more time in the oven than traditional bread. It just doesn't have gluten to help it set up quickly. Think of it like this: you're not just baking it, you're drying it out and setting the structure. If you pull it out too soon, you're pretty much guaranteed a gummy texture. We're talking about baking it until it's really done, not just golden brown on top.
Optimizing Oven Temperature For Gluten Free Loaves
Getting the oven temperature just right is important. Too hot, and the outside will burn before the inside is cooked. Too cool, and it might not bake through properly, leading to that dreaded gumminess. Most recipes will give you a temperature, but sometimes your oven runs a little hot or cool. It's worth getting to know your oven.
Using An Instant-Read Thermometer For Perfect Doneness
Honestly, this is the game-changer for us. Forget the toothpick test for a moment. The most reliable way to know if your gluten-free bread is baked through is by checking its internal temperature. We're aiming for an internal temperature between 205°F and 210°F. When it hits that sweet spot, you know the starches have gelatinized properly and the moisture has evaporated enough to avoid that sticky, doughy middle. It takes the guesswork out of it completely.
Essential Tools And Techniques For Better Bread
Choosing The Right Baking Pan
So, we've talked a lot about dough and baking, but let's not forget the gear! The pan you use can actually make a difference in how your gluten-free bread turns out. For starters, a good quality loaf pan is key. We like pans with higher sides, like a Pullman loaf pan, because they help give the bread structure as it rises. This is super helpful since gluten-free dough doesn't have gluten to hold it up on its own. Metal pans tend to conduct heat better than glass or ceramic, which can help get a nice, even bake and a good crust. Just make sure whatever pan you choose is clean and lightly greased or lined with parchment paper so your beautiful loaf doesn't stick.
The Benefits of Psyllium Husk Powder
If you've been experimenting with gluten-free baking, you've probably come across psyllium husk powder. It's a real game-changer for us! Think of it as a binder, kind of like gluten is in regular bread. When you mix psyllium husk powder with water, it forms a gel. This gel helps to hold the dough together, giving it that elasticity and structure that gluten-free flours just don't have on their own. It makes the dough less crumbly and easier to handle. Using psyllium husk powder can really improve the texture and prevent that sticky, gummy crumb we sometimes get. It also helps the bread retain moisture, leading to a softer loaf. We usually add it right into our dry ingredients and then mix it with the wet.
Creating Steam For A Better Crust
Want that bakery-style crust on your gluten-free bread? Steam is your friend! When the bread first hits the hot oven, a burst of steam helps the crust stay soft and flexible for a little longer. This allows the loaf to rise to its full potential before the crust sets. Once the steam dissipates, the crust can then crisp up nicely. There are a few ways we like to do this at home:
- The Water Pan Method: Place an empty metal pan on the rack below your bread. Just before you put the bread in, carefully pour about a cup of hot water into that pan. Close the oven door quickly!
- Spritzing: You can lightly spritz the oven walls (avoiding the light and heating element) with water right after you put the bread in. Be careful not to overdo it.
- Dutch Oven/Cloche: Baking your bread inside a preheated Dutch oven or a ceramic cloche traps the steam released by the dough itself. This is a super effective method for creating a fantastic crust and is often used for sourdough.
Cooling And Handling Your Gluten Free Loaf
The Importance of Complete Cooling
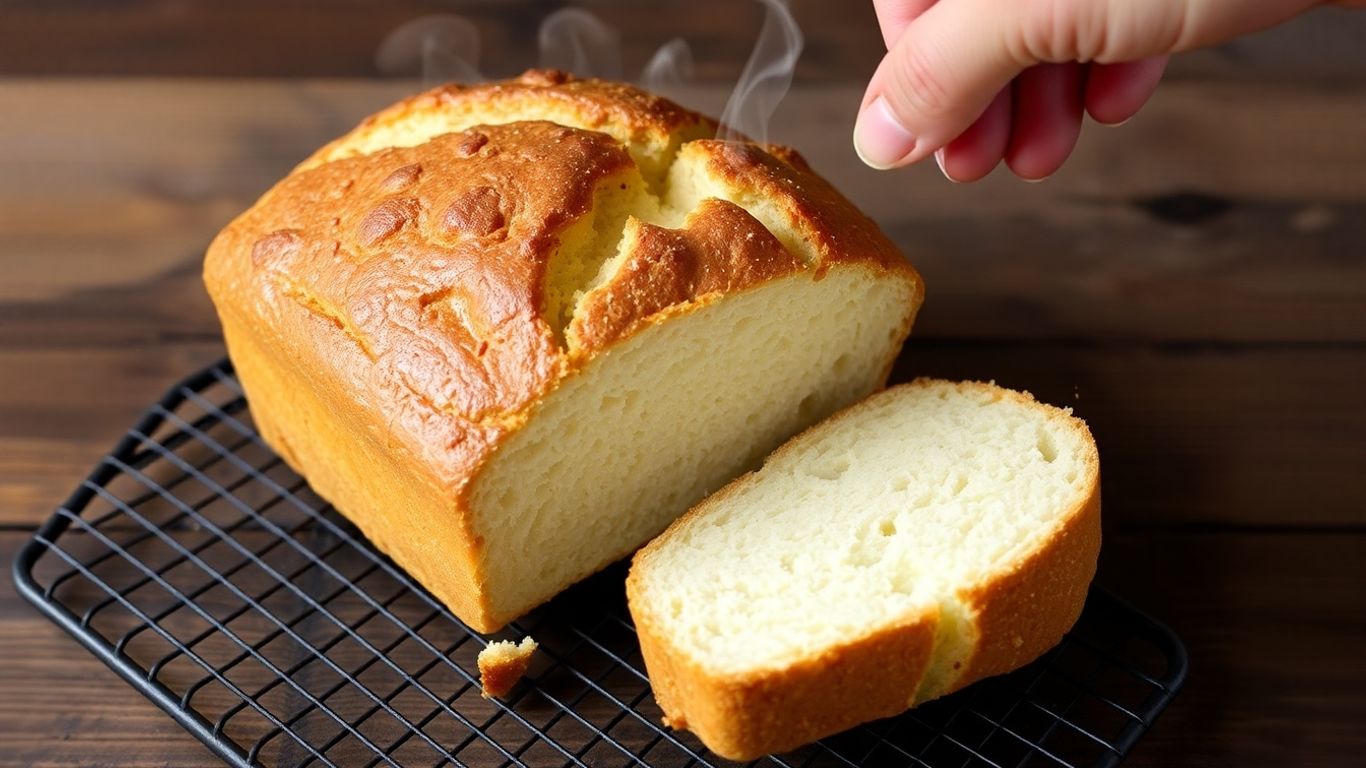
Okay, so we've finally baked our gluten-free bread. It smells amazing, and we're just itching to slice into it, right? Hold on just a minute! This is a really important step that many of us tend to skip. Gluten-free bread needs to cool completely before you even think about cutting it. When it's hot, the inside is still setting up, and if you slice it too soon, you'll likely end up with that sticky, gummy texture we've been trying so hard to avoid. Think of it like letting a cake rest – it needs time to firm up.
Why You Should Wait To Slice Your Bread
Seriously, this is where a lot of the magic happens after the bread comes out of the oven. The residual heat continues to cook the loaf, and the starches finish absorbing any remaining moisture. If you cut into it too early, all that internal moisture can make the crumb feel wet and dense. We're talking at least a couple of hours, but honestly, waiting longer is even better. If you can resist the urge and let it cool for half a day, you'll probably be rewarded with a much better texture. It's tough, I know, but patience really pays off here.
Troubleshooting A Sticky Crumb After Baking
So, you waited, you sliced, and... it's still a bit sticky inside. What gives? Usually, this points to one of two things: either it wasn't baked quite long enough, or it wasn't cooled long enough. If you've followed all the baking tips and it's still happening, double-check your oven temperature with a separate thermometer to make sure it's accurate. Sometimes, a slightly longer bake time at a slightly lower temperature can help cook the inside through without burning the crust. And remember that cooling time – it's just as vital as the baking itself. Don't give up if it's not perfect the first time; we're all learning!
So, Let's Get Baking!
We've gone over a bunch of ways to tackle that sticky gluten-free bread situation. Remember, it often comes down to a few key things: making sure it's baked all the way through (seriously, longer is usually better!), using the right binders like psyllium husk, and giving it enough time to cool down before you even think about slicing it. Don't get discouraged if your first few tries aren't perfect. We've all been there! Keep experimenting with these tips, and soon enough, you'll be pulling perfectly textured loaves out of the oven. Happy baking, everyone!

Written by
Co-founder, BakingSubs
Co-founder of BakingSubs, where he turns the science of ingredient substitutions into tested, reliable guidance for home bakers.
Related Posts
Protein Powder as Flour Replacement in Baking: Why It Fails (and 5 Fixes That Actually Work)
7 Low Carb Flour Alternatives for Bread (and Why Most Bakers Pick the Wrong One)
Almond Flour vs Coconut Flour for Keto Baking: 5 Differences That Actually Change Your Results
Bake with Confidence
See all
Confident Gluten-Free Baker Toolkit
The science-based system that replaces gluten's seven invisible jobs so your baking turns out soft, fluffy, and foolproof — every time.

Gluten-Free Recipe Vault
Instant access to our complete library of proven gluten-free recipes — no waiting, no guesswork, just results that work tonight.

Fix Your Gluten-Free Bread
Learn the 3-step formula to make bread rise and stay soft, discover why your loaves collapse, and get a tested sandwich bread recipe that actually works.