
No-Knead Gluten-Free Bread Recipe (Dutch Oven Artisan Loaf)
 By Maddy Williams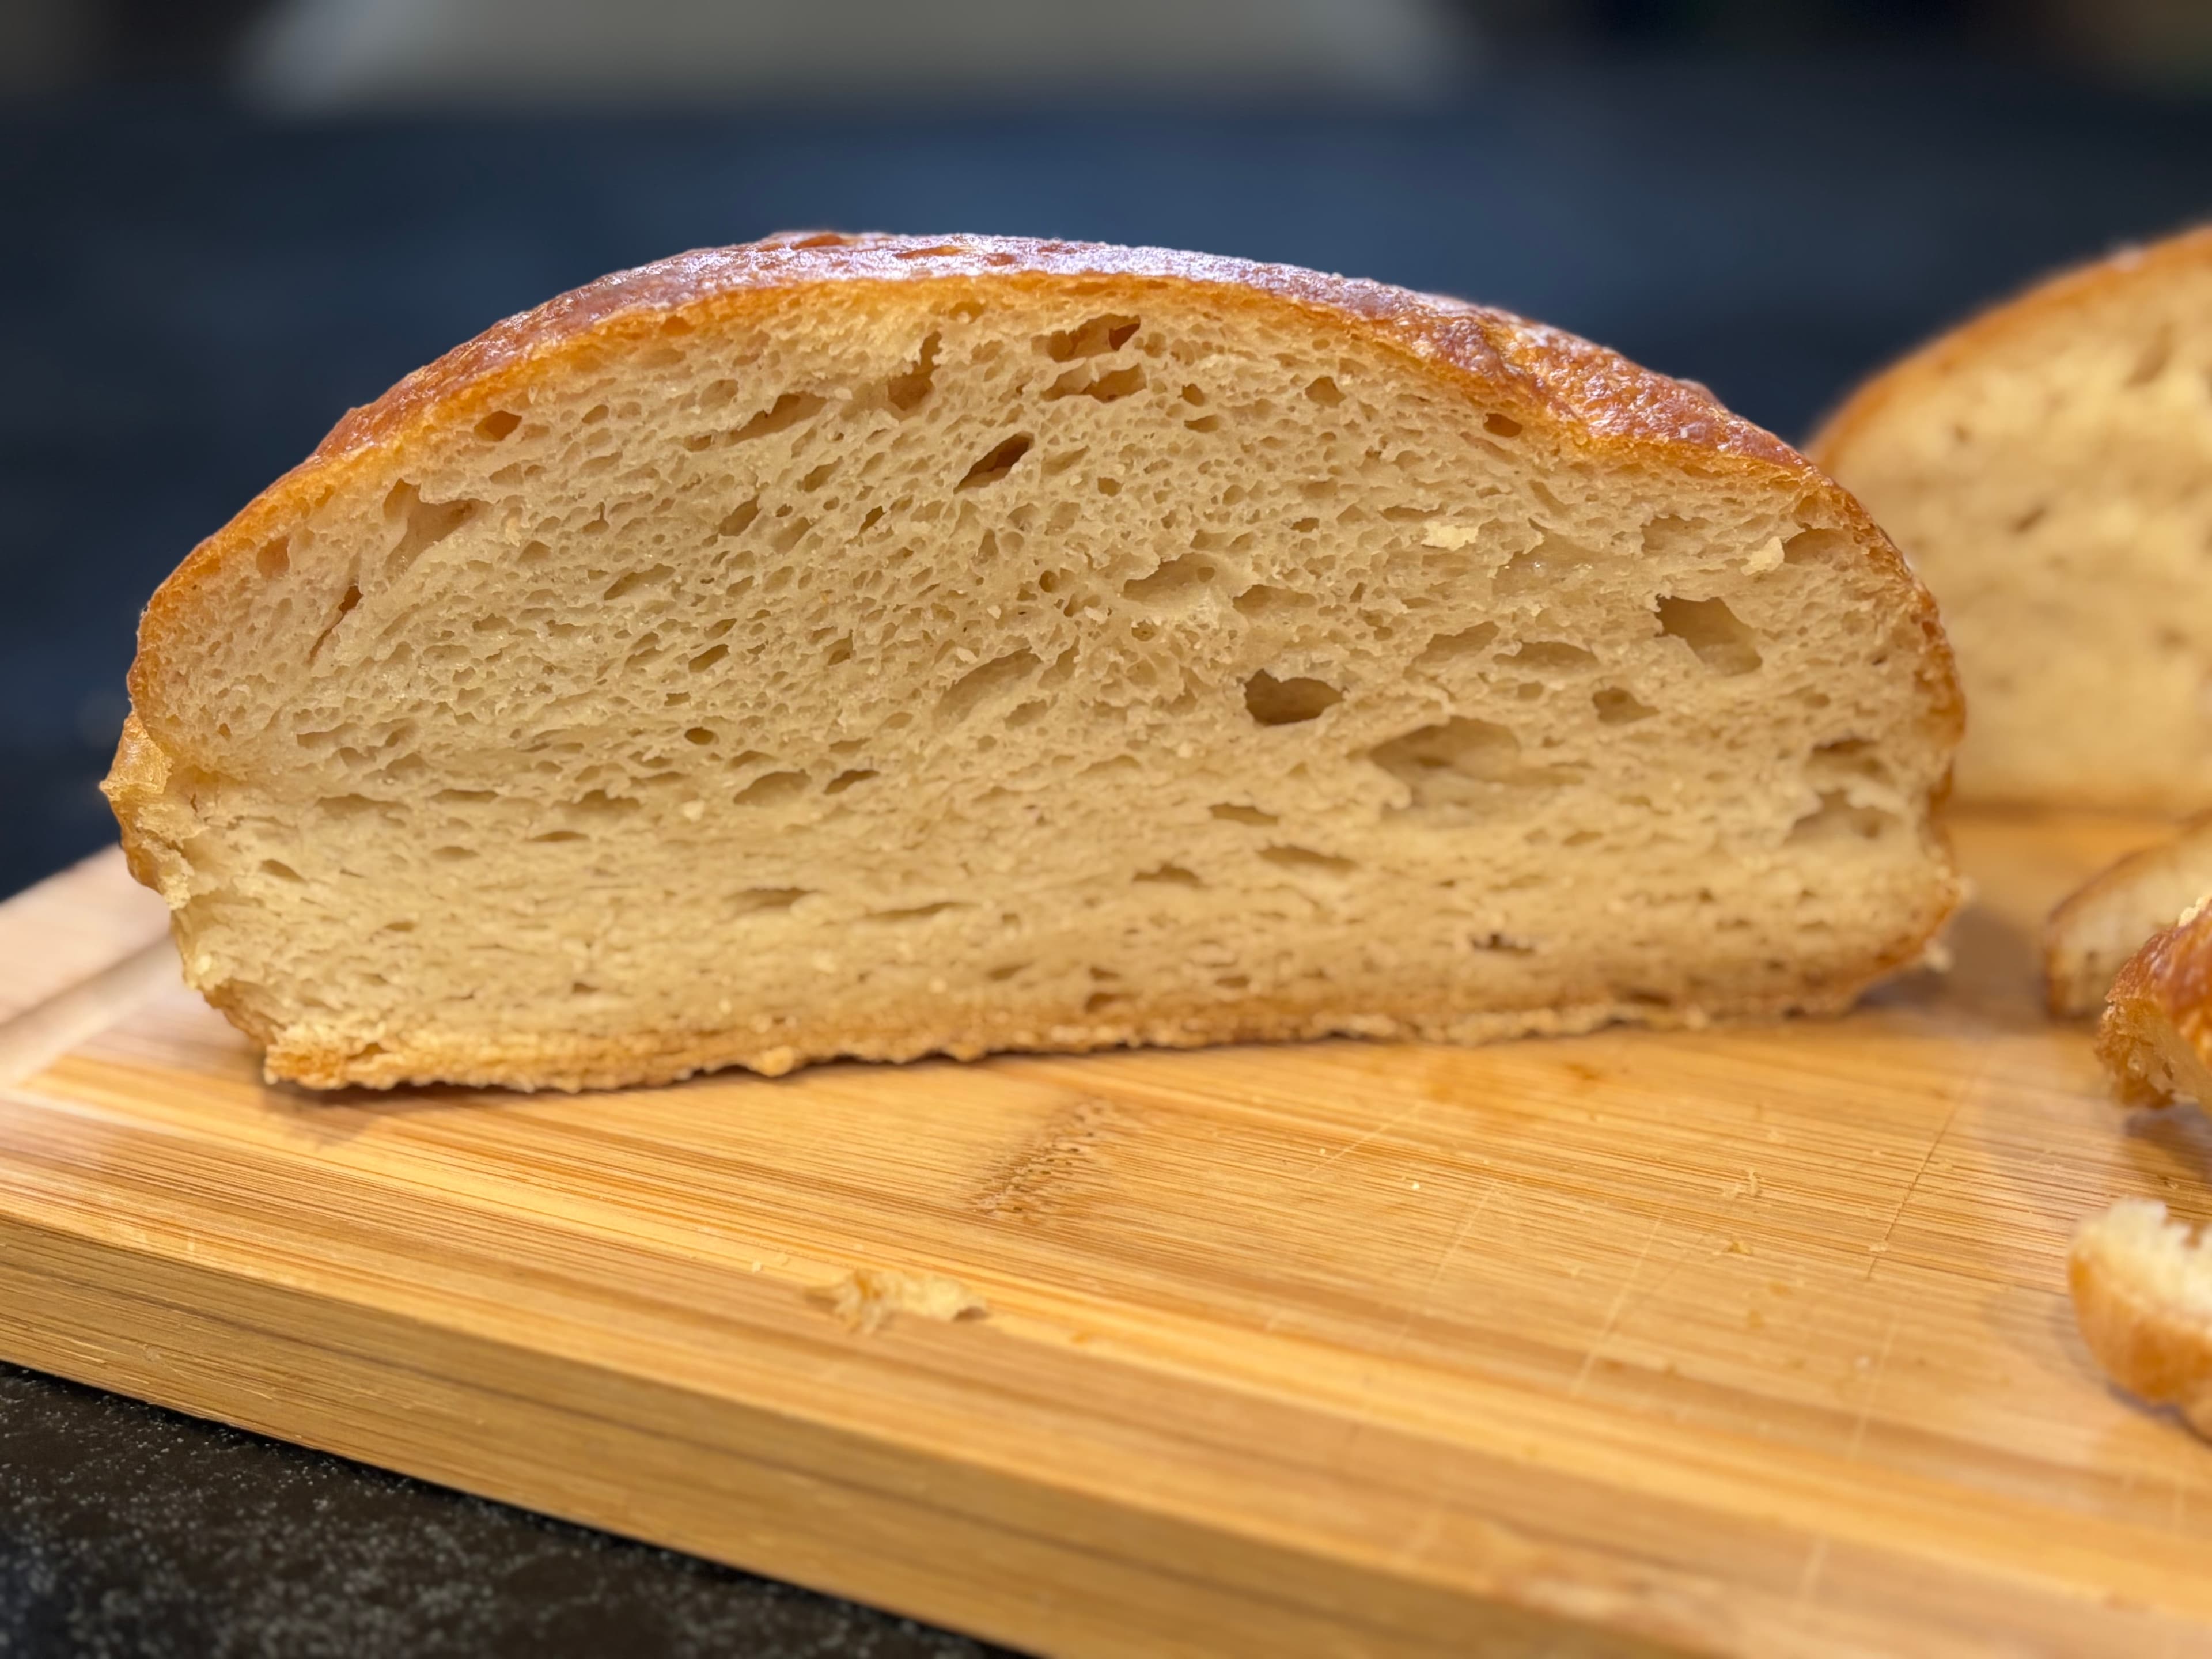
This is the loaf I get asked about more than anything else I bake, enough that I now teach a class on it. It is also the first recipe I taught Malik, because if you only ever learn one gluten-free bread, it should be this one.
Most gluten-free bread recipes are in a hurry. They mix, proof for an hour, and bake. What comes out is a dense, crumbly loaf that mostly tastes like the flour blend it came from. This one takes its time instead. An overnight starter plus a long room-temperature ferment does two things nothing else can fake: it builds real, faintly tangy flavor, and it gives the starches time to fully hydrate, which is what turns a gritty crumb into a soft one.
The payoff is a round, crackly-crusted loaf with an open crumb that actually holds together when you slice it. No kneading, no eggs, no dairy, no special pans. The one piece of equipment that matters is a Dutch oven. Trapping steam for the first 40 minutes is what gives the loaf its rise and shatters the crust.
Plan around the clock, not the effort. Hands-on time is about 20 minutes total; everything else is waiting. Mix the starter at night, mix the dough the next morning, and you will be pulling bread out of the oven the following afternoon.
Ingredients
- 1/4 tspInstant Yeast— for the starter
- 1/4 tspGranulated Sugar— for the starter
- 175 gWater— lukewarm, for the starter
- 90 gGluten-Free Bread Flour— for the starter, King Arthur recommended
- 1/2 tspInstant Yeast— for the dough
- 2 tspGranulated Sugar— for the dough
- 1 tspSalt— for the dough
- 210 gGluten-Free Bread Flour— for the dough
- 175 gWater— lukewarm, for the dough
- 1-2 tspNeutral oil— for oiling your hands during the stretch and folds
Instructions
- 1
Make the starter. In a medium bowl, whisk together 1/4 tsp instant yeast, 1/4 tsp sugar, 175g lukewarm water, and 90g gluten-free bread flour until no dry flour remains. Cover and leave it on the counter overnight. Four hours is the minimum, though 8 to 12 is better. A turned-off oven or a microwave both work as draft-free spots. Do not preheat the oven.
- 2
Mix the dough. Add 1/2 tsp instant yeast, 2 tsp sugar, 1 tsp salt, 210g gluten-free bread flour, and 175g lukewarm water to the starter. Mix 3 to 5 minutes by hand, or 2 to 3 minutes in a stand mixer, until the dough is smooth and cohesive with no dry patches left.
- 3
Bulk ferment. Cover the bowl and let the dough rest 14 to 24 hours somewhere warm and draft-free. This long rest is where the flavor and the texture develop, so do not cut it short.
- 4
First stretch and fold. Oil your hands, then stretch and fold the dough over itself 5 times, working your way around the bowl. Cover and rest 45 to 60 minutes.
- 5
Second stretch and fold. Oil your hands again and repeat 5 more stretch and folds. Gently form the dough into a ball, cover, and rest another 45 to 60 minutes.
- 6
Preheat. About 45 minutes before baking, ideally right after that last stretch and fold, heat the oven to 450°F (232°C) with your Dutch oven inside. Leave the lid out on the counter so only the base preheats.
- 7
Transfer the dough. Carefully take the hot Dutch oven out and line it with parchment paper, which keeps the loaf from sticking and makes it easy to lift out later. Lower the dough in and cover with the lid.
- 8
Bake covered. Bake 40 minutes with the lid on. The steam trapped under that lid is what gives the loaf its rise and its crust.
- 9
Bake uncovered. Remove the lid and bake another 10 to 20 minutes, until the crust is deep golden brown.
- 10
Cool completely. Lift the loaf out and let it cool at least 25 minutes before slicing, though closer to an hour is better. Gluten-free bread finishes setting as it cools, and cutting early leaves you with a gummy crumb.
Tips
Choosing your flour
This recipe was developed with King Arthur Gluten-Free Bread Flour, and the hydration is tuned to it. Other blends absorb water differently. If you swap, expect to adjust the water by 10-20g in either direction to reach the same smooth, cohesive dough. Our guide to the best gluten-free flours for bread covers how the major blends behave.
If you are avoiding wheat because of an allergy rather than celiac disease, read your flour's label closely, because several gluten-free bread flours are built on de-glutenized wheat starch.
Getting the timing right
The 14 to 24 hour bulk rest is a range, not a mistake. A warm kitchen (75°F and up) pushes you toward the short end, a cool one toward the long end. The dough is ready when it has visibly puffed and smells faintly tangy.
Start the 45-minute oven preheat right after your final stretch and fold, so the Dutch oven and the dough are ready at the same moment.
Why the cooling time is not optional
Gluten-free crumb sets as it cools, not in the oven. Cutting into a hot loaf lets out the steam that is still finishing the interior, leaving a gummy, wet center. That is the single most common reason a perfectly good gluten-free bake gets written off as a failure. Twenty-five minutes is the floor; an hour is better.
Storing it
Keep the loaf cut-side down on a board at room temperature for up to two days. Do not refrigerate it, because that stales gluten-free bread quickly. For longer storage, slice the fully cooled loaf, freeze it flat in a bag, and toast straight from frozen.
If something went wrong
A gritty crumb usually means under-hydration or too short a rest. See why gluten-free bakes turn out gritty. For dense loaves, pale crusts, and collapsed tops, our gluten-free bread troubleshooting guide works through 15 common problems.
Equipment
A 4 to 6 quart Dutch oven is the one thing worth buying for this recipe (our picks here). An instant-read thermometer removes the guesswork on doneness. This loaf is finished at 205-210°F in the center.
Want to go deeper?
I teach a gluten-free bread masterclass built around this loaf. It covers how to read your dough, adjust for your own kitchen, and fix a bake while it is still fixable rather than after it comes out of the oven. Details and dates here.
Nutrition values are estimates based on a standard gluten-free bread flour blend and will vary by brand.
Written by
Co-founder, BakingSubs
Co-founder of BakingSubs, where she develops and tests the recipes and substitutions that help home bakers get it right the first time.
No reviews yet. Be the first!